These adorable handmade Bunny Peeps Earrings will make a "sweet" addition to any Easter basket!

Looking for some festive Easter jewelry? These Easter Peeps Earrings are just the sweetest! Made with wood, glitter, and topped with resin, these earrings are a unique accessory and make a great Easter gift to add to baskets! This project is so easy to make using an xTool S1 laser cutting machine, and I'm going to walk you through the process step-by-step. If you are new to laser crafting and also want to try UV resin, THIS is a great project to start with!

To make your own Easter Peeps Earrings, you will need these supplies:
*Save extra 15% off on xTool selected materials: AFFMTRS15
*$999 - $80 use code: NEW80
*$1699 - $100 use code: NEW100
*$1599 - $100 use code: XT100
Printables and cut files from Artsy-Fartsy Mama are for personal use only. This means you may use these for your own creations, but you may not sell them. If you'd like to share this project digitally, share a link to this post/website only. Do not share a direct link to the printable/cut file.

Upload the Peeps Earrings design into xTool Creative Space. In the right menu bar, change the material setting to 3mm Basswood. When you upload an SVG design, you need to make sure each part of the design is set for cutting, scoring, and/or engraving. For this project, all you everything in red needs to be set to cut, and black needs to be set to engrave.
*Feel free to adjust the size of the earrings to suit your preferred earring length. The pieces I cut were about 1.25" tall.

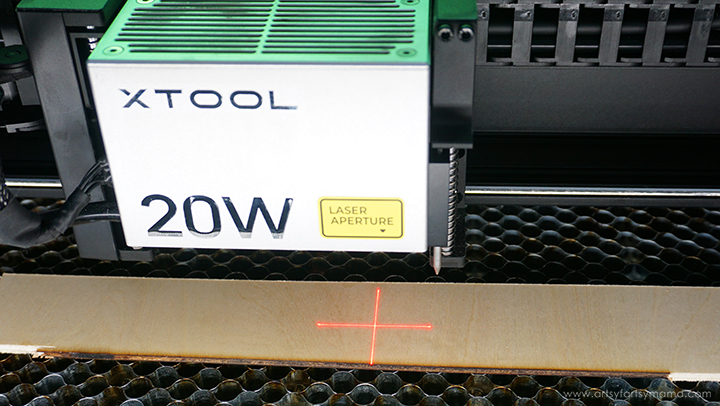
Place a piece of 3mm basswood into the xTool S1 machine - earrings are always a great project for scrap pieces of wood! Manually pull the laser box with your hand so that the red "+" is located on the material - it doesn't have to be centered.
In XCS, you will see "Distance (mm)" in the right menu bar. Click on the target icon to the right of that space, and the machine will automatically measure your material.
For more details on how to complete this step, be sure to check out my review of the xTool S1 Laser Machine!
Make sure that the earring design elements are within the marked bounding box in XCS, and then click the green "Process" button in the bottom right corner to proceed to cutting the project.

After removing the earring pieces from the machine, I would highly recommend cleaning the soot away from around the edges of the wood using a Magic Eraser or baby wipes to prevent making marks all over your hands and workspace.
Once cleaned, paint the front and back sides of the earring pieces using acrylic paint or paint markers in pastel colors. I made multiple earring sets and painted them in pastel pink, blue, yellow, and purple. No matter what color you choose, I highly recommend trying to find the closest shade to match the glitter to pair it with.
Speaking of glitter, the earrings are going to be covered in it. So you don't need to add multiple coats of paint to the front side of the earrings. If you want full coverage on the back, you can add more than one coat of paint. I used paint markers and only applied one coat to both sides.

After the paint has dried, use a fine point black paint marker to carefully fill in the engraved eyes and nose on the front of the earring pieces. If necessary, apply a second coat of paint for full coverage.

Use a small paint brush to apply a thin, even coat of Mod Podge on the surface of the earring. Try not to get it into the eyes and nose areas, if possible. If the Mod Podge is applied thickly or unevenly (thick in some areas and thin in others), the glitter may not have the look you want once it dries.

Another option that works just as well (or sometimes better) is to pour a pile of glitter directly onto the paper, and then place the earring piece face-down into the glitter. Press it down into the glitter, and then carefully pick it up and gently tap it down into the glitter a couple more times.
Stand the earring piece up and tap the bottom of it on the workspace to shake off any excess glitter. Repeat the process for each earring you want to make in this same color. Once done, lift the paper on the ends to bring the glitter into the center. Carefully funnel the glitter back into the container, and shake off any excess into a garbage can.


Even though there's no Mod Podge in there (or even if there is), the eyes and nose will get filled with glitter. Don't panic! It's a simple fix: use a pointed tool (I used a weeding tool) to gently scrape the glitter out of the areas. If you did get Mod Podge in there you will just have to use a little more effort to remove the glitter, but it's not too hard.

Repeat the Mod Podge and glitter process if you are making different colors of Peeps earrings. Lay the pieces flat and allow them to dry. The Mod Podge has dried completely once it changes from white to transparent.

If you accidentally use a little too much pressure and scrape some of the black paint away, you can carefully fill the areas in again with paint marker.

Even though the glitter is stuck to the earring pieces with Mod Podge, it can still flake off or be scratched off (boooo). To keep it in place, you'll need to seal it! You can do this with another thin layer of Mod Podge, but I prefer the domed look on earrings I get using UV resin.

Use a toothpick to cover the entire surface with resin, making sure to get it right to the edges. Pop any surface bubbles with alcohol.

Cure the resin under the UV light for at least 3-5 minutes. The resin should no longer be tacky to the touch. If it is, the resin needs to cure for a longer time. I also recommend applying a thin layer of UV resin the opposite side of the earrings to protect the wood.


Each earring needs one jump ring and one earring hook. Open the jump rings with jewelry pliers and hook them through the top hole of each earring piece. Attach the earring hook to the ring and close it to keep in in place. Repeat the same process for the second earring, and then they are ready to wear!

Aren't these Easter Bunny Peeps Earrings just the sweetest?! You can make pairs of the same color, or have fun mixing and matching different colors! These are a fun project to make using the xTool machine to make or sell for friends and family. I would love to see if you make some for yourself using this tutorial. Leave me a comment, or tag a photo on Facebook, Twitter, or Instagram! #AFMcrafts
Don't forget to Pin, Like, and Share!


