Create a custom Santa Christmas Countdown Magnet to keep on display throughout the holiday season!

Ever since my daughter was little, we've kept a variety of advent calendars and countdowns on display for the entire month of December. She loved getting to change the numbers as each day passed by, and made the long wait until the big day a lot more bearable. This Santa Christmas Countdown Magnet is a lot of fun and SO easy to make using the xTool S1 laser cutting machine, and can be customized with your child's name! It takes minutes to assemble, and will definitely be a hit with the kids this holiday season!
New to laser cutting? Be sure to check out how to get started with the xTool S1 Laser Machine!


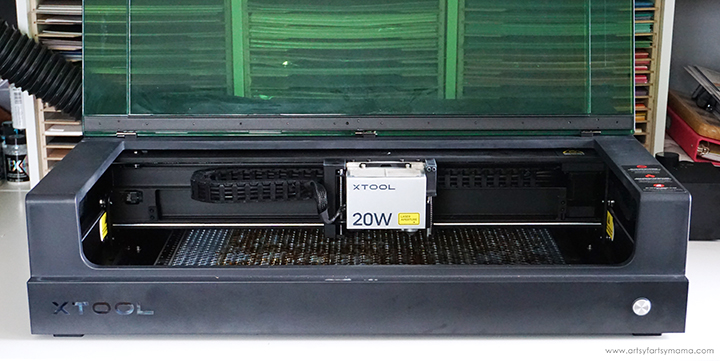
The crafting possibilities are endless when it comes to using the xTool S1 laser cutting machine, and it's actually very easy to use! Once you have one of these, the hardest thing you'll have to do is decide what to make with it. If you want to learn more about how this incredible machine works, be sure to check out my complete xTool S1 review.

To make your own Santa Christmas Countdown Magnet, you will need these supplies:
- xTool M1 or xTool S1 laser cutting machine
- Santa Christmas Countdown Design
- 3mm Basswood
- Acrylic Paint Markers - black, red, green
- Stain or Chalk Paint Wax
- Strong Adhesive
- Clamps (optional)
- Clear Sealant
- Magnets
*Save extra 15% off on xTool selected materials: AFFMTRS15

Upload the Santa Christmas Countdown design into xTool Creative Space. In the right menu bar, change the material setting to 3mm Basswood. When you upload an SVG design, you need to make sure each part of the design is set for cutting, scoring, and/or engraving. For this project, everything in black needs to be set to engrave, red needs to be scored, and the purple needs to be cut.
Last, but not least, type in the name that you'd like on the magnet on the little plaque-shaped piece. You can use any font you'd like! The font I used is "Ouch! Sorry".
*Tip: when cutting larger projects like this, fill in open spaces with smaller designs, like earrings!

Place a piece of 3mm basswood into the xTool S1 machine. Manually pull the laser box with your hand so that the red "+" is located on the material - it doesn't have to be centered. In XCS, you will see "Distance (mm)" in the right menu bar. Click on the target icon to the right of that space, and the machine will automatically measure your material.
*For more details on how to complete this step, be sure to check out my review of the xTool S1 Laser Machine!
Make sure that the design elements are within the marked bounding box in XCS, and then click the green "Process" button in the bottom right corner to proceed to cutting the project.
After removing the wood pieces from the machine, I would highly recommend cleaning the soot away from around the edges of the wood using a Magic Eraser or baby wipes to prevent making marks all over your hands and workspace.

Next, it's time to paint the countdown pieces! I love seeing the wood grain, so I often use stain or antique chalk paint wax on the base piece. If you're using the wax, paint a thick coat over the surface of the larger snow globe-shaped pieces and then use a paper towel to wipe the excess away. Cover the opposite side of the back piece the same way. If you want it to be darker, you can apply multiple coats. Just make sure to let each coat dry completely before adding another.
Next, use acrylic paint markers (or a small brush and acrylic paint) to paint Santa's face/body, beard, number gear, and nameplate in the colors of your choice. Some paint colors may need more coats than others, so just make sure to allow each coat to dry completely before adding another.

Once the paint has dried, it's time to assemble the countdown. First, work on Santa. Apply strong adhesive on the back side of Santa's beard piece, and then place it on top of the base. Don't forget to add on the nose and hat pom! The back piece just needs the circle placed on top of the score line, and then the piece at the bottom.
For the front piece, align the two border pieces with the name plaque in between at the bottom as pictured above. Allow the adhesive to set before moving on to the next step.

Now you can place Santa on the front piece, lining the bottom edge with the top of the border at the bottom. When you place the numbered gear onto the back piece, do NOT use any adhesive! This piece needs to be able to move. However, apply a small amount of adhesive on the front of the circle in the center.

Place the front piece on top of the back, and make sure all of the edges are aligned. Clamp pieces in place, if necessary, until the adhesive is set to keep them from shifting.

Once the adhesive has fully set, I would recommend covering the wood with a coat of clear sealant. This will protect the paint and keep this piece looking good as new for years to come.
At this point, the countdown can technically be used and put on display. It can stand on its own, and you simply turn the gear to change the number in the countdown window.

Another option is adding magnets to the back of the countdown. This makes it easy and convenient to display the countdown for people like me who might not have a lot of shelf space!
Attach one or two magnets to the back of the countdown with strong adhesive and make sure to give it plenty of time to set. Then you can hang the countdown up on the refrigerator, door, or anywhere a magnet will stick.

This Santa Christmas Countdown Magnet is such a fun project to make with the xTool, and I'm looking forward to making a bunch more for my nieces and nephews! As always, I would love to see what you're making! Share your creations on Instagram, Facebook, or leave a comment/photo on the project pin on Pinterest! #AFMCrafts
Don't forget to Pin, Like, and Share!


