These Resin Inlay Sea Turtle Earrings are a unique and shimmery accessory that goes with everything!

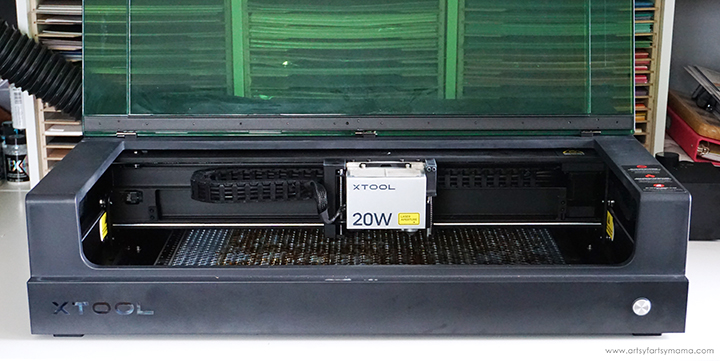
If you're looking for some beach-inspired jewelry, these Sea Turtle Earrings are just what you need! Made with wood and inlaid with shimmery resin, these earrings are a unique accessory and make a great gift! This project is so easy to make using an xTool S1 laser cutting machine, and I'm going to walk you through the process step-by-step. I'm also sharing the laser cut file so that you can make some for everyone you know (including yourself)!
New to laser cutting? Be sure to check out how to get started with the xTool S1 Laser Machine!


The crafting possibilities are endless when it comes to using the xTool S1 laser cutting machine, and it's actually very easy to use! Once you have one of these, the hardest thing you'll have to do is decide what to make first. If you want to learn more about how this incredible machine works, be sure to check out my complete xTool S1 review.

To make your own Resin Inlay Sea Turtle Earrings, you will need these supplies:
- xTool M1 or xTool S1 laser cutting machine
- Sea Turtle Earring Design
- 3mm Basswood
- Stain or Chalk Paint Wax
- Packaging Tape
- Amazing Clear Cast Resin
or UV Resin with UV Light - Chameleon Flakes - Green, Lime
- Toothpick
- 2 10mm Jump Rings
- 2 Earring Hooks
- Jewelry Pliers

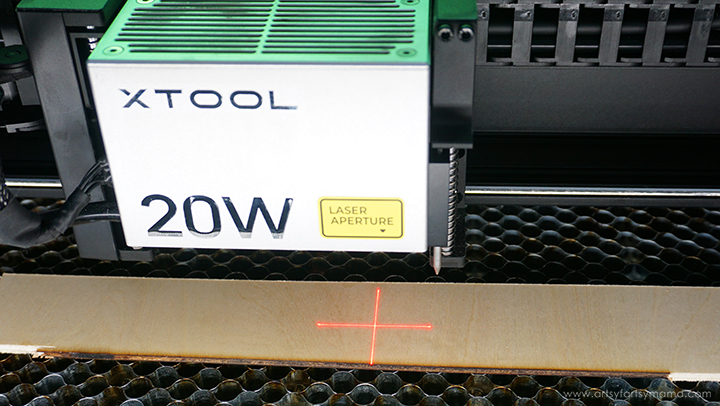
Place a piece of 12"x18" 3mm basswood into the xTool S1 machine. Manually pull the laser box with your hand so that the red "+" is located on the material - it doesn't have to be centered.
In XCS, you will see "Distance (mm)" in the right menu bar. Click on the target icon to the right of that space, and the machine will automatically measure your material.
For more details on how to complete this step, be sure to check out my review of the xTool S1 Laser Machine!

Upload the Sea Turtle Earring design into xTool Creative Space and duplicate the design once to create a second earring. When you upload an SVG design, you need to make sure each part of the design is set for cutting, scoring, and engraving. For this project, you only need to cut, so don't even worry about scoring or engraving this time! In the right menu bar, change the material setting to 3mm Basswood.
Make sure that the earring design elements are within the marked bounding box in XCS, and then click the green "Process" button in the bottom right corner to proceed to cutting the project.

After removing the earring pieces from the machine, I would highly recommend cleaning the soot away from around the edges of the wood using a Magic Eraser or baby wipes to prevent making marks all over your hands and workspace.


Next, mix up some green chameleon flakes with a little bit of of resin in a small mixing cup using a toothpick. You won't need as much of this resin, because you will only be filling up the heart in the center of the turtle shells. Again, be careful to not overfill.

Now it's time to stain the wood earrings. Pick out your favorite stain, or use an antique chalk paint wax like I did. If you're using the wax, paint a thick coat over the surface of the wood and let it sit for a few minutes.

Use a paper towel to buff away the excess wax from the surface of the earrings. You can see the difference between the painted wax and the buffed wax on the turtle earring on the left. If you want the finish to be darker, you can apply another coat.
Repeat the process for the opposite side of the earrings.

Cut a 6-8 inch piece of packing tape and fold the ends over. This makes it easier to move the earrings around, if necessary. Place the turtle earring pieces face-down on the sticky side of the tape and use a brayer tool to press them down REALLY well. Turn the tape over and press them again. I'd recommend even scraping the tape down well with your fingernails so that the earrings are stuck to the tape as much as possible. Any air bubbles or openings will give the resin areas to seep out.

Mix up a little bit of lime chameleon flakes with a little bit of of resin in a small mixing cup using a toothpick. Use the end of the toothpick to fill the spaces of the outer shell design on both of the of the turtles with the resin mixture. Fill the openings all the way to the top, but be careful to not overfill!

Spritz the resin with 91% alcohol to remove surface bubbles. If you are using Clear Cast Resin, allow the resin to cure for at least 12 hours. If you are using UV resin, slide the tape under a UV light for about 5 minutes to cure the resin. Next, flip the tape/turtles over, and cure the earrings again under the light for another 5 minutes.
Lightly tap the surface of the resin to make sure it has cured. It should be hardened completely and no longer tacky.

Slowly and carefully peel the turtle earrings away from the tape. If there are any areas that don't seem to be cured or are sticking to the tape, stick it back down and put it back under the UV light to cure it a bit longer. If you have any sticky residue left behind from the tape, you can remove it easily with a little bit of alcohol.

To give the earrings a finished look, dome the top with one last coat of UV resin. Use a toothpick to cover the entire surface with resin, making sure to get it right to the edges. Pop any surface bubbles with alcohol, and then cure under the UV light. I would also recommend covering the opposite sides of the earrings.
Next, attach the earring hooks to the jump rings. Close the jump rings with the pliers. Make sure they are completely closed so that the hooks don't come off!

I absolutely LOVE how these earrings turned out, and would love to hear what you think! If you are looking to start a small business using the xTool S1 machine, these would be a great product to sell. As always, if you make any of these projects for yourself, I'd love to see your creations! Tag me on Instagram and Facebook, or leave a comment/photo on the project pin on Pinterest!
Don't forget to Pin, Like, and Share!


These turtle earrings are fantastic! My husband has the X-tool… And now you’ve given me ideas!
ReplyDelete