Enjoy the art of Diamond Painting with these helpful tips and tricks for beginners!
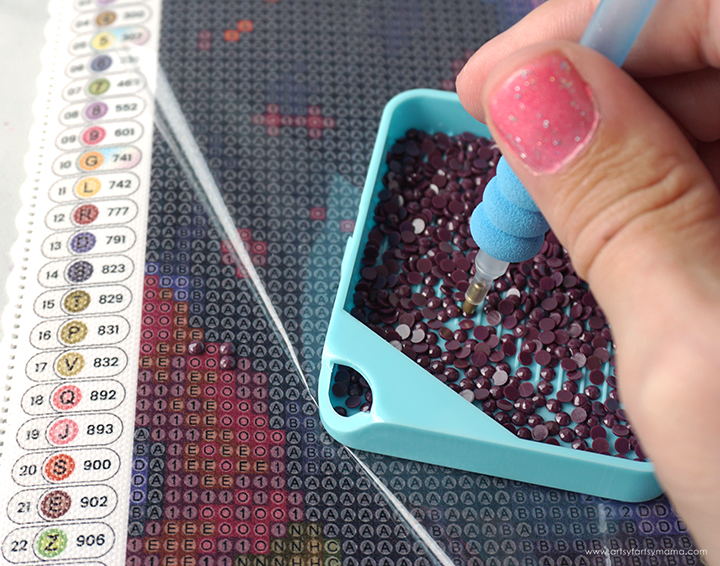
Diamond painting has become something that I really enjoy doing in my free time. For me, it's more than just an artsy hobby. It has actually helped me a lot with coping with anxiety and relieving stress. Most days I'm rushing around to get ALL.THE.THINGS done, and diamond painting gives me a way to slow down and enjoy the moment. Once a painting is completed, I also get to enjoy the feeling of accomplishment and pride in creating something beautiful. If you've ever been interested in diamond painting, I'm here to tell you all there is to know about getting started!
Diamond Painting Tools

Before getting started with diamond painting, you'll need some tools. This handy Diamond Painting Storage Case from ArtDot includes everything you need, and is a great way to keep your tools organized. It's also a fashionable way to take your diamond painting on-the-go!
Must-have tools for successful diamond painting:
- Diamond Painting Pens; a pen-like tool to transfer the drills, or "diamonds" onto the canvas.
- Wax Glue: combine with the painting pen to allow the drills to stick for transferring to the canvas.
- Diamond Drill Trays: pour the drills into the tray to easily transfer to the canvas via the pen.
- Tweezers: use to help flip drills over or to adjust drills on the canvas.
- Fixing Tool: helps to straighten lines of drills on the canvas, giving your painting a cleaner look.
- Silicone Funnel: use funnel to quickly and efficiently pour excess drills into an empty storage container or bag.
- Storage Containers or Bags: keep extra drills organized and stored to use later on other projects.
Of course, you can get all of the tools individually, but you will save a lot of money by getting the storage case with everything included.
*Use code ARTSY to save 10% on diamond painting supplies!
Diamond Painting Kits

Now that you have the tools, all you need is the art! From kids to advanced, there are all kinds of diamond painting kits for every level. The levels don't actually relate to difficulty. They are all the same as far as transferring drills to canvas, but the level is more about the size of the art and how much time it will take to complete.
I am going to show you this stunning Rose Diamond Painting Kit from ArtDot, which is a "beginner" level kit that measures 14"x10" when completed and contains 15,700 diamonds. For comparison, the "advanced" kit measures 20"x14" and contains 28,500 diamonds! The tubed packaging helps prevent the art from being creased, and is convenient for storing your project during and after your progress.

If you haven't gotten tools yet, don't worry! The Rose Diamond Painting Kit comes with the basics for you to complete the painting, including a diamond paint pen, adorable heart-shaped wax, a drill tray, and labeled packets containing the diamonds for the painting.
Most importantly is the canvas. Printed on a velvety fabric, the rose artwork is front and center with a labeled color code key listed on the sides for easy reference. The image is made up of labeled squares that coordinate with the colors in the key to create the image using drills. The canvas (on the artwork section only) is coated with a very sticky adhesive so that the drills immediately stick in place when pressed onto it and is covered with a plastic sheet. ALWAYS keep the artwork covered when you aren't working on it to keep it from drying out.
Diamond Color Code
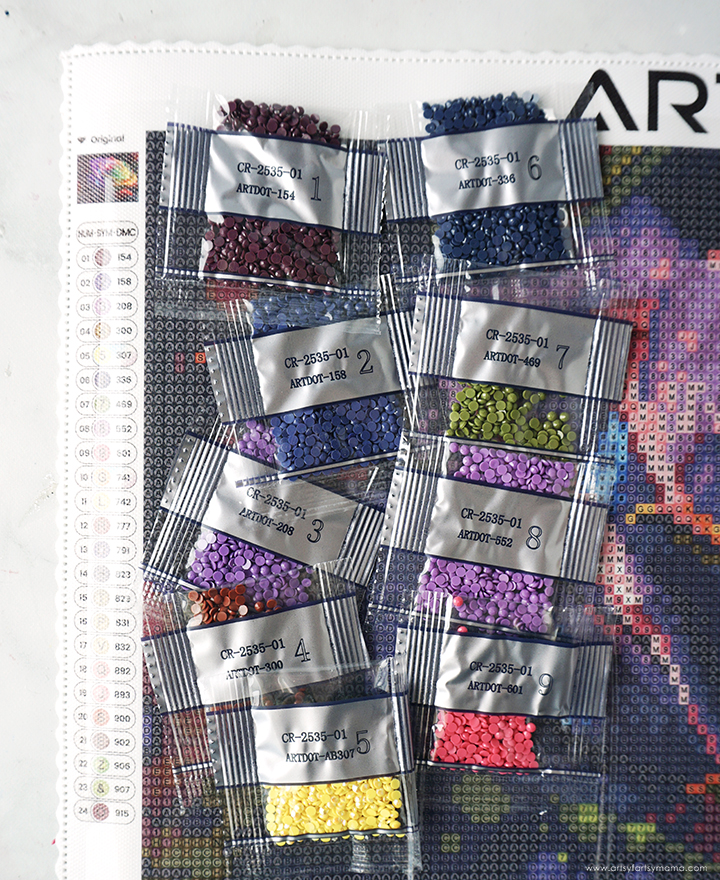
When you look at the artwork, each square is labeled with the circled numbers/symbols found in the color code key.
Getting Started with Diamond Painting
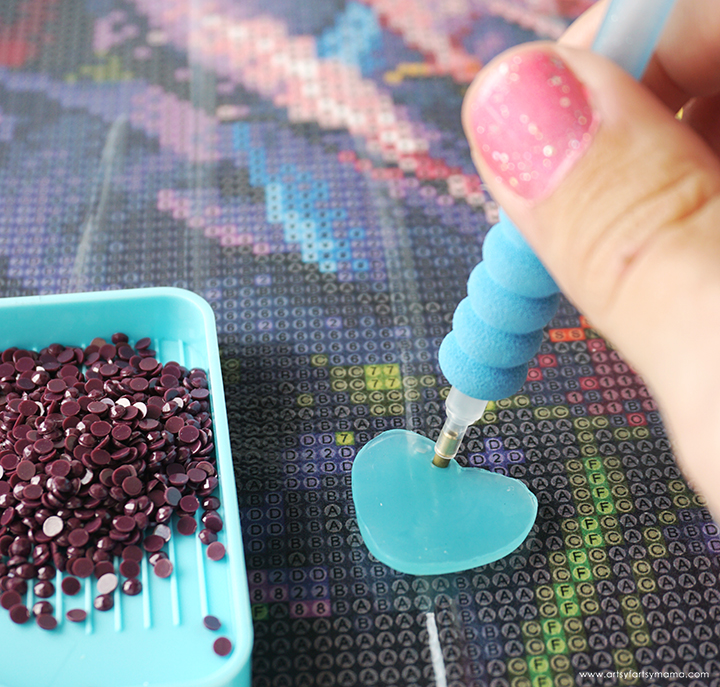
Lay your canvas on a flat surface and give yourself plenty of room to work. Pour the #1 packet of diamonds into the drill tray. Give the tray a gentle shake to help the drills lie faceted-side up.
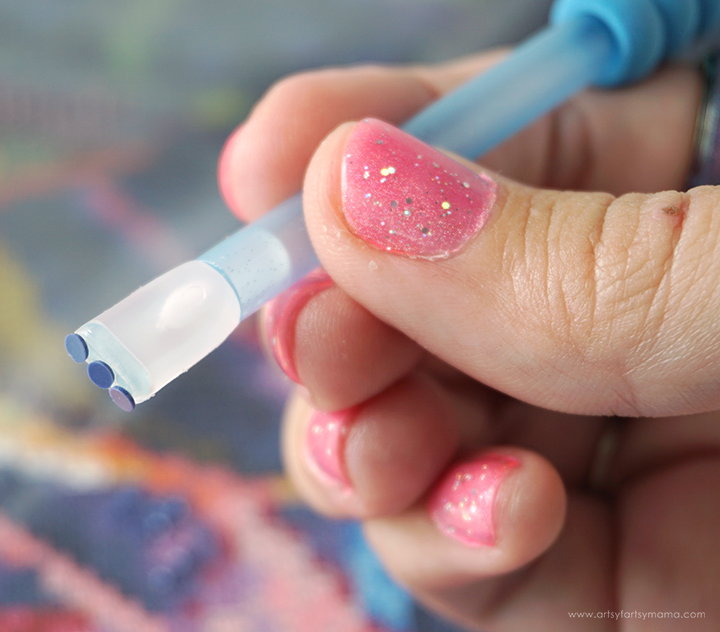
Lift the plastic cover from one edge of the heart-shaped wax piece and poke the end of the diamond paint pen into the wax. The end of the pen is hollow, so poking it into the wax fills up the end of the pen with sticky wax to help pick up drills easily.

Peel up just the corner of the protective plastic to reveal the adhesive-covered image. Gently press the pen onto the top of a faceted diamond drill in the tray. If after a while it becomes hard to pick up diamonds, press the tip of the pen into the wax again to refill.
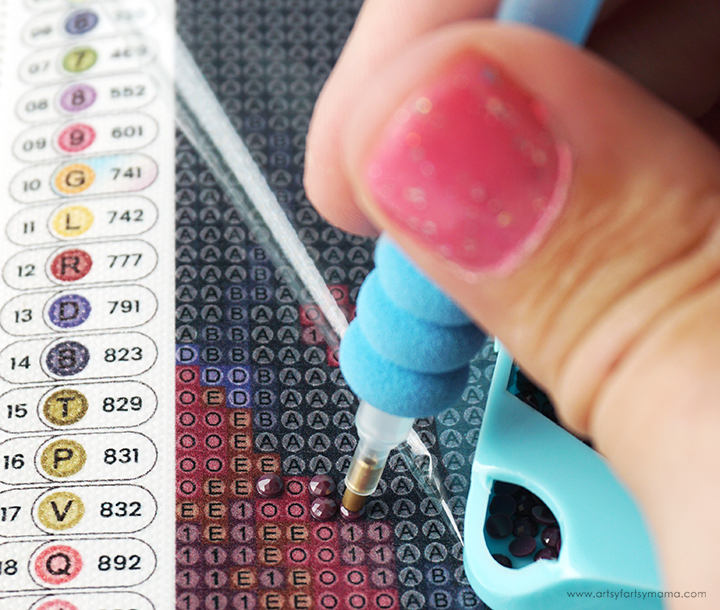
Once the diamond is stuck to the tip of the pen, move the diamond over to the canvas and place it over the number or symbol from the color code key. For example, this is color from packet 1, and the circled number/symbol is also 1. Use this color of diamond to color every "1" on the canvas. The canvas adhesive is a lot stickier than the wax in the pen, so it will stick to the canvas immediately.
Everyone ends up having their own preference with diamond painting. Some people, like me, like to go in number order and "painting" the canvas one number at a time. Others prefer covering the canvas sections at a time instead. Do what works for you! There's no wrong way to diamond paint!

When you are done with the color, cover the canvas again with the plastic, and then carefully pour the diamonds into a storage container or bag. The kit also comes with labels for each of the colors so that you can add it to the container! This is extremely helpful if you need to stop working mid-project or want to use that same color again on another project.
Diamond Storage

The Diamond Painting Storage Case is a lot more than just organizing your supplies. It also comes with multiple storage containers in a foam holder that fits perfectly in the base of the case. Depending on the size of the case, it can hold multiple LAYERS of containers!
After I was done with each color diamond, I poured the extra into the containers and then put them into the case to use for later. Every time I open the case, it makes me so happy seeing all of that organization!!
Finishing Up

Once the canvas is covered, sit back and admire your work and be proud of what you accomplished! You created a work of art, and that should be appreciated. If you have any diamonds that pop out of place, put them back in by hand or with the pen and press them down really well.

At this point, you can put the rolled canvas back into the tube, store it in a diamond painting folder book, or put it on display! I decided to frame mine! Before putting it into the frame, use scissors to carefully trim the edges of the canvas away.

*Use code ARTSY to save 10% on diamond painting supplies!
Don't forget to Pin, Like, and Share!


