Use colorful polymer clay to create a custom set of Mosaic Cane Polymer Clay Earrings!
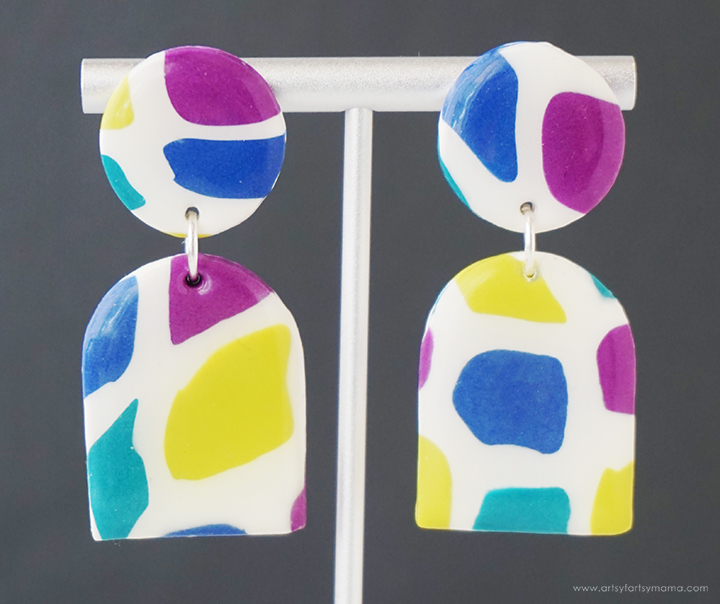
I've been trying some new techniques using polymer clay, and this set of Mosaic Cane Polymer Clay Earrings was so much fun! If you are new to creating with clay, you've got to give this project a try. It's so much easier than I thought it would be, and crafters of any skill level can create a pair of custom earrings in no time. I love how chic the earrings turned out, and think they would make a great gift or product to sell in your small business.

To make your own Mosaic Cane Polymer Clay Earrings, you will need these supplies:
- Sculpey Soufflé Polymer Clay - Igloo, Grape, Cornflower, Sea Glass, and Citron
- Ceramic Tile or Oven-Safe Work Mat
- Clay Slicer Tool or Craft Knife
- Clay Roller with Roller Thickness or 2 Craft Sticks
- Earring Clay Cutters
- Circle Cutters
- Gloss Glaze or UV Resin
- Jewelry Pliers
- 2 Jump Rings
- 2 Earring Posts
- Strong Adhesive

Use a slicer tool or craft knife to carefully cut half of the top section of the Citron Sculpey Soufflé polymer clay. Use this as a guide to cut pieces of the same size from the 1oz blocks of purple, blue, and teal clay*. You will need to cut two pieces from the white.
Tip: If you work directly on a ceramic tile or baking mat, you don't have to worry about transferring your project when it's time to bake the clay. This significantly reduces the chances of you dropping, misshaping or ruining your project in the process.
*I used four colors of clay for this project, but you can use as many as you want! Just cut the same amount of clay for each color you decide to use.
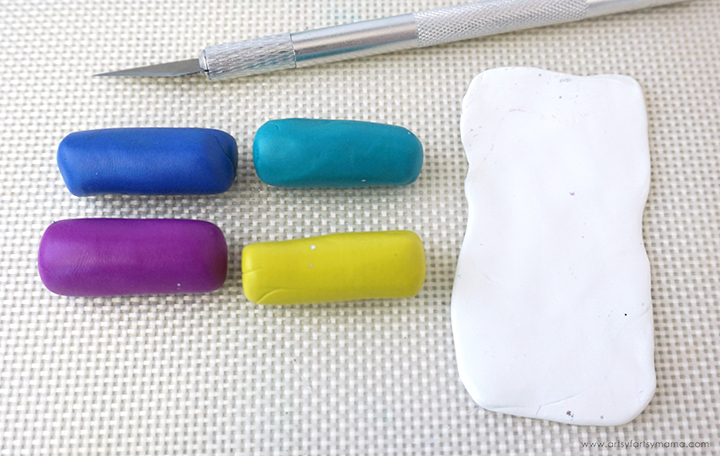
Condition, or knead the clays well until they are a smooth, pliable texture. Shape each of the colors into about 3" long cylinders. Use the clay roller to flatten the white clay into a long rectangle measuring about 3" wide - or a similar width to the rolls of colored clay.
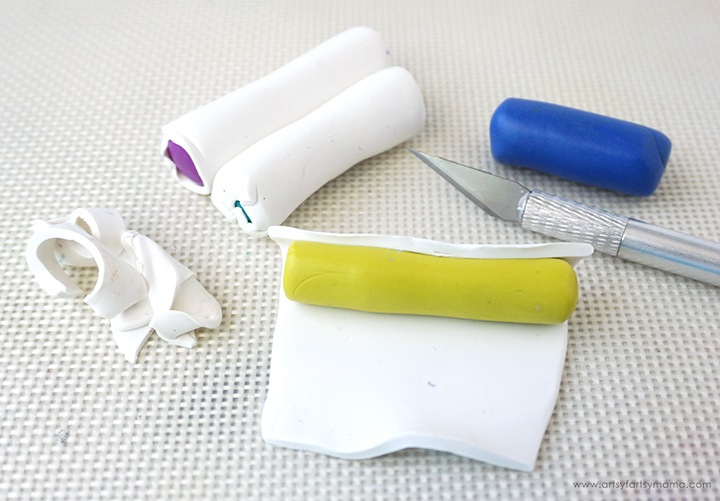
Use the slicer tool or craft knife to trim the top edge of the white clay so that it's straight. Place one roll of clay at the top edge, and roll it over. Cut the clay where the edges meet, and then gently roll the wrapped clay to press the clays together and smooth the edge. Repeat this process for all clay colors.
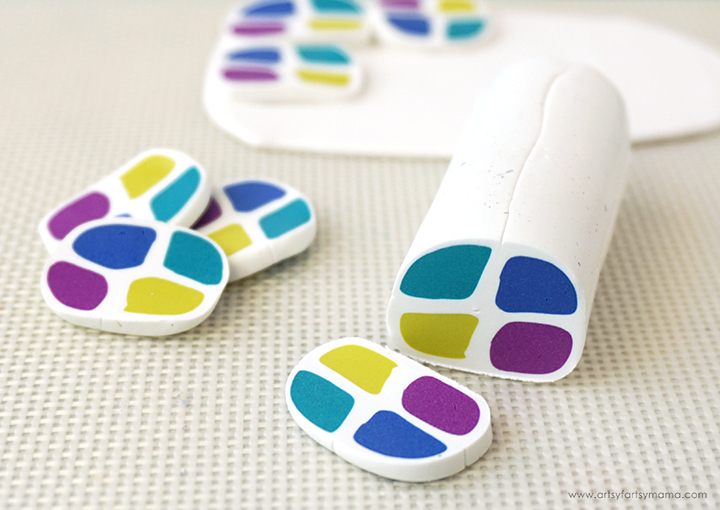
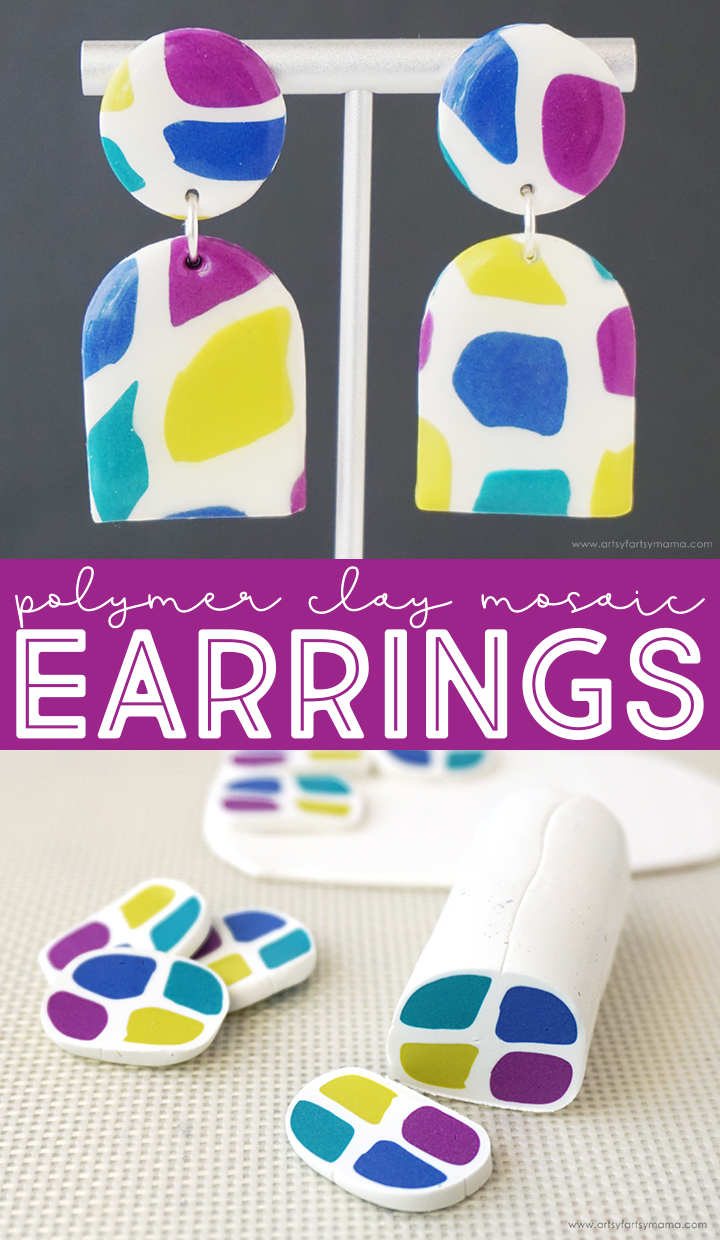
I shaped my cane to measure about an inch thick and 5-6" long. You can make the mosaic pattern even more colorful by rolling the cane a little thinner and longer, and then cutting that into even pieces. Roll the pieces together in a new cane.
Use the slicer tool or craft knife to cut the cane into 10-12 slices about 1/8" thick.


To cut out the earrings, I recommend making a top and bottom piece using cutters in creative shapes. You could also freehand with a craft knife. Place the cutter over the clay and gently press it straight down. Pull the cutter straight up. If the clay stays down, leave it there. If it comes up with the cutter, be careful how you remove it. Poking through the top to push the clay out will leave dents or holes in your work. If necessary, you can re-roll the clay and start over.

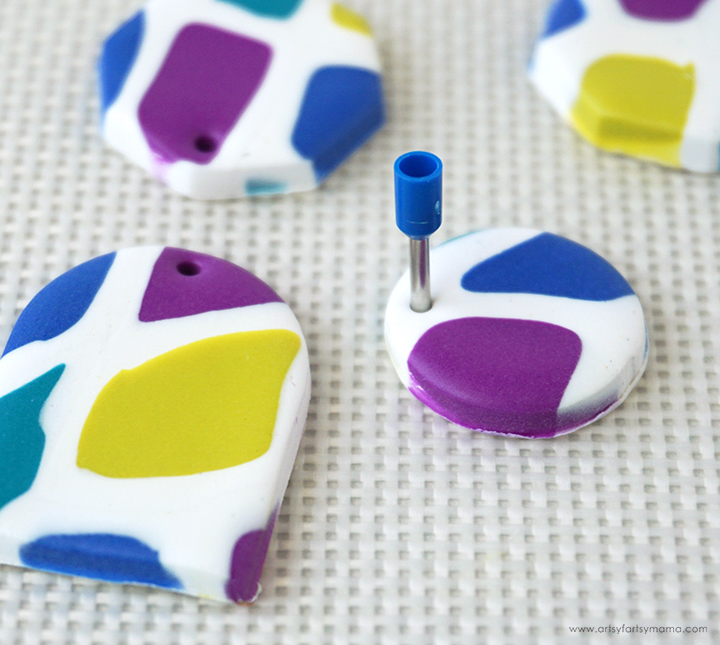

Use a fine sandpaper to clean up the edges of the earring pieces. To give the earrings a shiny and professional finish, apply a coat of gloss glaze or UV Resin to the surface with a toothpick.



Use a clay roller with 3mm thickness rings or line 2 craft sticks parallel to each other with the rest of the 1oz block of white clay in between. Flatten the clay into a large rectangle.

Arrange the cane slices over the white clay rectangle, placing them as close together as possible. This is called a "slab". Flatten the slab again with the roller and 3mm thickness rings or 2 craft sticks. This will make the clay an even thickness, while blending the slices together at the same time. It's okay that the shapes become distorted.

Here's a few tricks & tips for cutting clay that have worked for me:
- Place a piece of plastic wrap over the clay first, and then cut the clay.
- Your clay or workspace might be too warm. Put the clay in the fridge or freezer to cool it down before cutting.
- Dust the cutter with cornstarch or baking powder. Tap to remove the excess before cutting.

Carefully peel away the excess clay and leave the earring pieces in place. It's ok if the edges of the earrings look a little rough. Just make sure to remove all of the excess.

Use a toothpick or a small circle cutter to make holes in the earring pieces to connect them later.
Preheat your oven and bake the earring pieces. Most polymer clays are usually baked at 275º for 15 minutes per quarter inch thickness, but refer to your specific clay packaging directions to make sure. Once baked, let the pieces cool completely before handling.

If using glaze, apply it to the clay in thin coats (30 minutes between each coat). Give the earrings 24 hours to dry completely.
If using UV resin, apply a thin coat over the earrings, and cure under a UV light according to package directions.

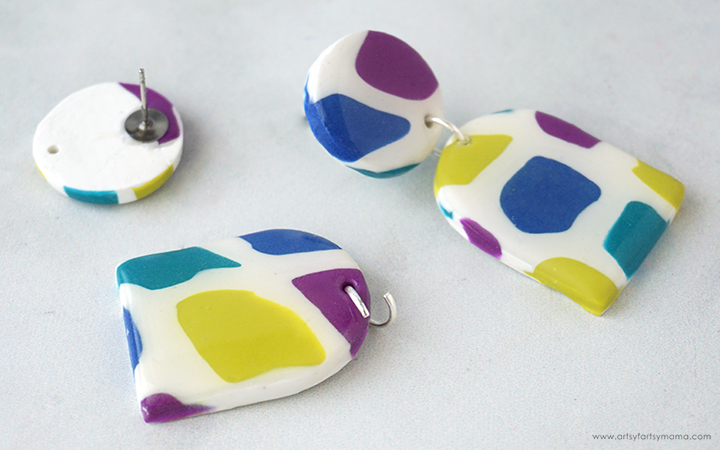
Use pliers to open 10-12mm jump rings. Hook the rings through the holes in the earring sets. Close the jump rings with the pliers.
Turn the earrings over, and attach an earring post to the center of each round/top clay piece using strong adhesive or UV Resin.

I absolutely LOVE how these earrings turned out, and making a clay mosaic cane for the first time was a lot of fun! I'm looking forward to trying this technique again with different colors and sizes. I had enough clay slab to work with that I made two more sets of earrings in circle and hexagon shapes. I think they are so cool, and would make such great gifts!

Making jewelry out of polymer clay is a lot of fun, and so easy! There are so many ways to customize these earrings to fit your style with different shapes, colors, and sizes. If you ever make some Mosaic Cane Polymer Clay Earrings or any other clay crafts, I would love to see them! Leave me a comment, or tag a photo on Facebook, Twitter, or Instagram! #AFMcrafts

Want more polymer clay craft inspiration? Beth from Creatively Beth created these adorable Clay Cactus, and Laura from Me & My Inklings made a stamped Kindness Tokens!!
Don't forget to Pin, Like, and Share!


