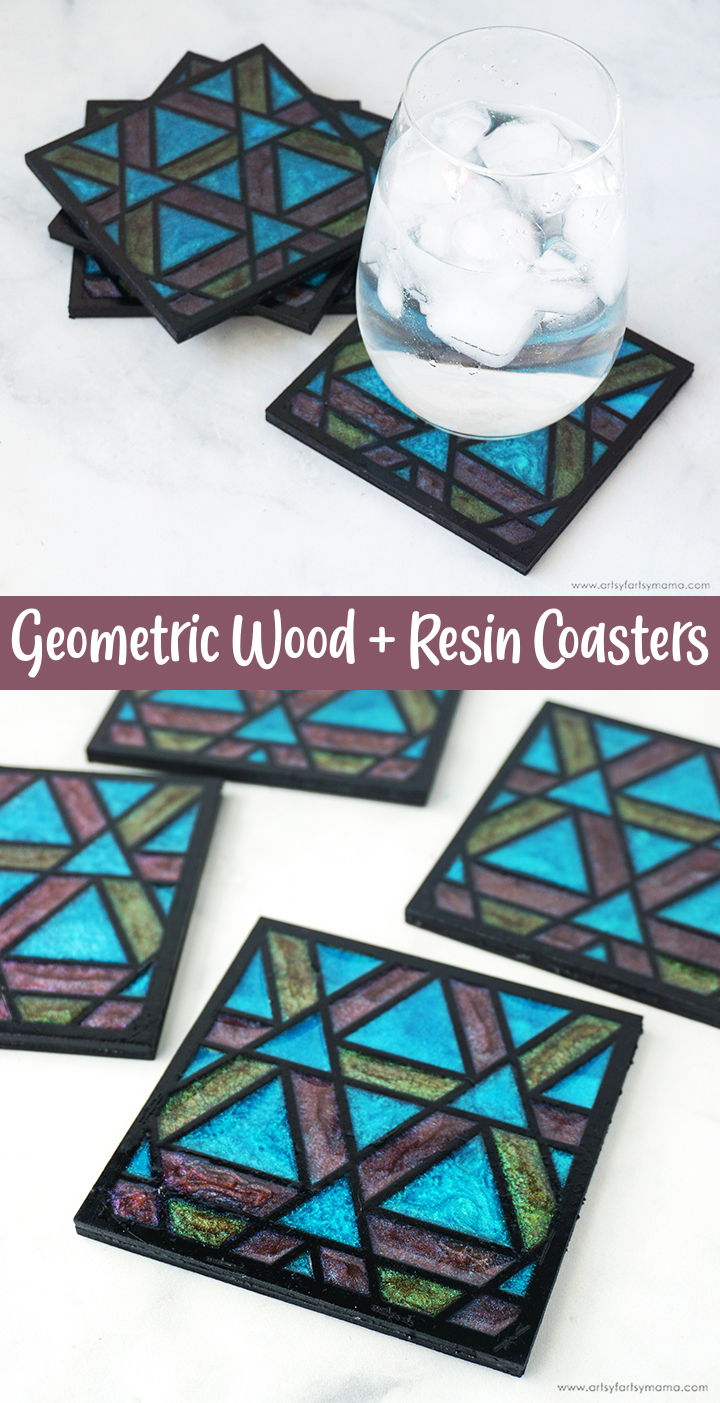
Combine the magic of the xTool M1 and colorful resin to make a stunning set of Geometric Wood + Resin Coasters!

The great thing about learning so many different crafting techniques is that you can combine them to create something awesome! Ever since I go the xTool M1, I've been wanting to combine laser cutting with resin. This Geometric Wood + Resin Coaster set is easy to make, and is a great project for both resin AND laser crafting beginners! The coasters can be customized for gift giving, and look professional enough to sell in your small business. This was such a fun project, and I hope you feel inspired to give it a try!
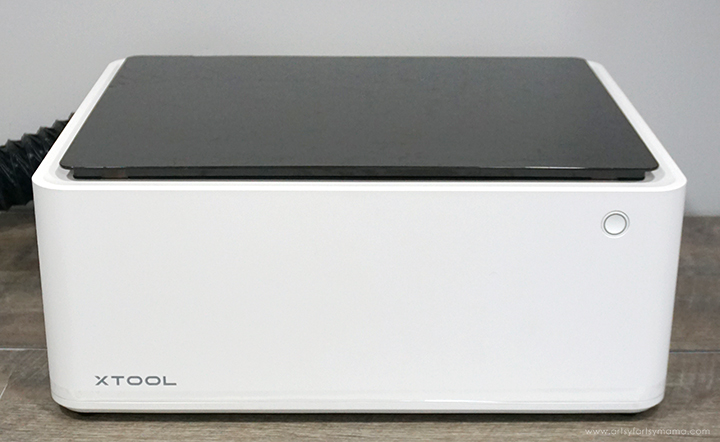
There are SO many projects you can make using the xTool M1 laser cutting machine, and it's actually very easy to use! Once you have one of these, the hardest thing you'll have to do is decide what to make first. If you want to learn more about how this incredible machine works, be sure to check out my complete xTool review.
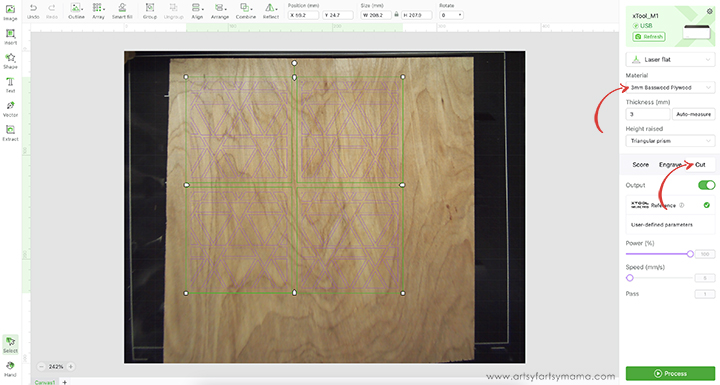
Place your piece of wood into the xTool M1 machine, on top of the triangular prisms. When you close the lid, the image of the inside of the machine should show up on your screen. If it doesn't, click "Refresh" in the top right (green) section of the menu.
Next, select the material type from the drop-down menu on the right side of the screen. I used the pre-loaded settings for "3mm Basswood Plywood" material. Make sure that you also select "Triangular Prism" from the "Height Raised" drop-down menu. By selecting the material before you get started, it will automatically adjust the settings for cutting your projects.
Upload the Geometric Coaster SVG Design into xTool Creative Space. Adjust the size of the coaster, if necessary (mine is 4"). Select the design, and click on the "Cut" option in the right menu bar. As long as you set the material first, you shouldn't have to adjust any settings.
Duplicate the coaster design to create a set of 4 coasters and arrange them on your piece of wood. Once you are happy with the layout, click the green "Process" button in the bottom right corner.
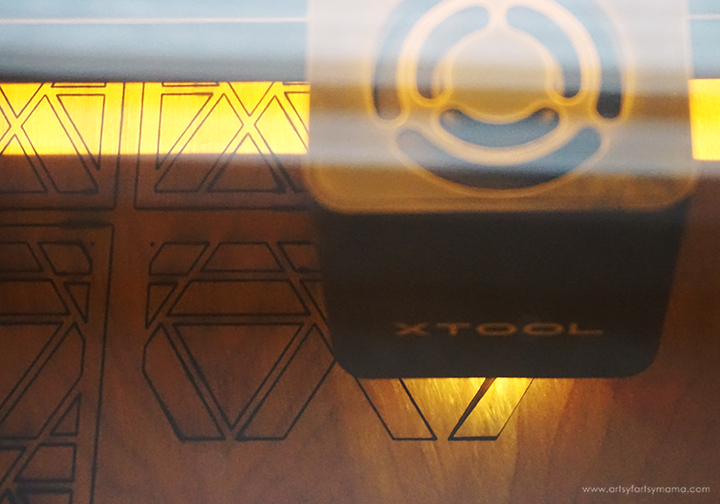
Press the large, lit button on the front of the machine to start the cutting and engraving. It's so fun to watch the laser in action! I love watching my designs come to life, and am always so impressed with the how precise the xTool is for even the smallest of details.
To help get cleaner and smoother cuts (especially on wood), I definitely recommend having the Air Assist Set!

Place a fresh piece of wood in the machine to make the coaster bases. Make one more duplicate of the coaster design and move/delete the previous coasters so that you don't cut them again. Select the design and click "Ungroup" in the top menu bar. This will separate all of the different parts of the design. Select everything in the center of the coaster and delete it, leaving just the outer border of the coaster still on the canvas.
Duplicate the coaster base to pair with the previous coaster pieces and arrange them on your piece of wood. Once you are happy with the layout, click the green "Process" button in the bottom right corner and cut the pieces out the same way as the other coasters.
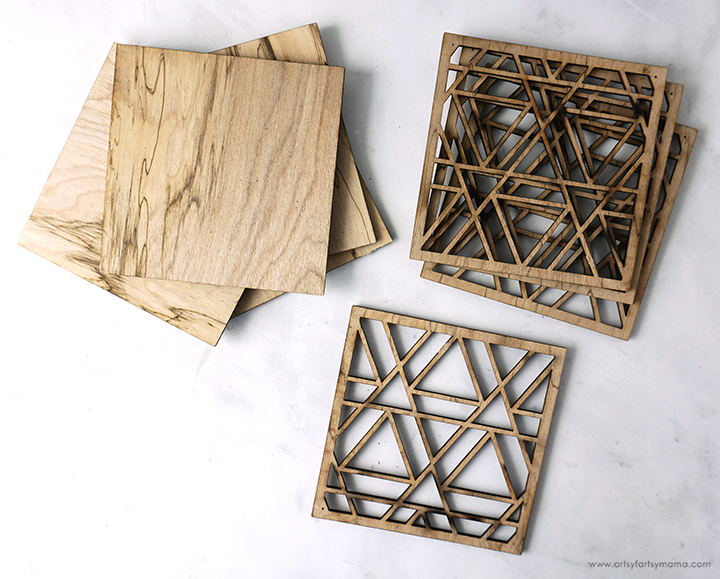
Now you should have a total of 8 coasters: 4 solid, and 4 with the geometric design cut out. Because the laser cuts by burning, there will be some soot left behind (if you use the Air Assist, there will be a lot less soot). I would recommend cleaning the soot away around the edges using a Magic Eraser or baby wipe.

Once cleaned, cover all of the coaster pieces with a few coats of black spray paint (any finish). Just make sure to let each coat dry completely before adding another layer. You could absolutely use acrylic paint instead, but I found that the spray paint was a lot quicker.
You don't have to paint both sides of the wood (unless you want to). However, be sure to check that all of the sides and edges have been covered.
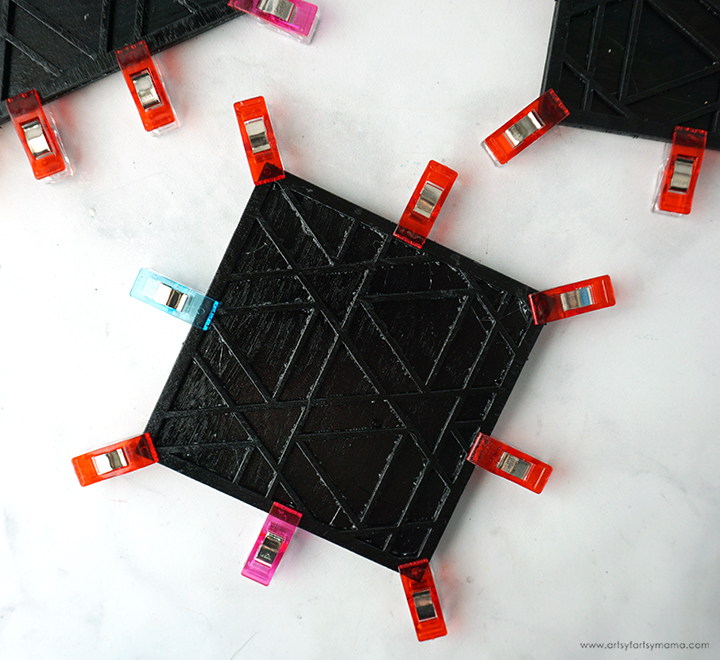
Apply a thin layer of strong adhesive to the back of the cutout coaster pieces. I know there are a lot of thin lines in the design, but cover them all. You don't want any open spaces between the two coaster layers, otherwise the resin can seep through later.
Center the top coaster layer on the base, and hold the pieces together with small clamps or clips and allow the adhesive to dry completely (refer to package directions). It's okay if a little excess adhesive comes out from under the top layer. Just make sure any adhesive is wiped away from around the outside edges.
Once the adhesive has completely dried, larger clumps of dried adhesive on the coaster can be cut away with a craft knife. Make any touch-ups with paint, if necessary. Now you are ready to move on to the next step: adding resin!

To make your own set of Geometric Wood + Resin Coasters, you will need these supplies:
- Laser Cut Wood Coasters (see above)
- Amazing Clear Cast Resin
- Measuring/Mixing Cups
- Stirring Sticks
- Disposable Gloves
- Color Creator Mica Powders
*Save 10% on resin supplies when you shop ETI with code AFM
SAFETY FIRST: Before getting started, wear disposable gloves, protect your workspace, and be sure to work in a well-ventilated area!

Next, prepare 15ml of Amazing Clear Cast resin according to package directions. Pour in equal parts of resin and hardener to the mixing cup. Slowly stir the resin together with a stir stick for two minutes. If the resin looks cloudy or has any streaks running through it, you need to keep stirring it until it becomes clear.
Add in a generous amount of blue Color Creator Color Change Powder into the mixing cup. Stir the resin mixture well for a minute or two until evenly incorporated. Give the resin a few minutes to "rest" and allow the bubbles to rise to the top.

Use your stir stick to add resin to all of the open triangle shapes in the coaster. Since the spaces are so small, my best advice is to work slowly and to add small drops at a time. For extra small spaces, you could use a toothpick instead. Make sure that you DO NOT overfill the spaces!
If you notice any resin seeping underneath the top layer and into neighboring spaces, don't panic. Let it "ooze" while you finish pouring. Once the coaster spaces are filled, dip the end of a cotton swab into some alcohol and gently wipe away any excess resin.

Prepare another 15ml of Amazing Clear Cast resin according to package directions. Pour in equal parts of resin and hardener to the mixing cup. Slowly stir the resin together with a stir stick for two minutes. If the resin looks cloudy or has any streaks running through it, you need to keep stirring it until it becomes clear.
Add in a generous amount of purple Color Creator Color Change Powder into the mixing cup. Stir the resin mixture well for a minute or two until evenly incorporated. Give the resin a few minutes to "rest" and allow the bubbles to rise to the top.

Use a stir stick or toothpick to add purple resin to all of some of the trapezoid shapes in the coaster. Again, work slowly and to add small drops at a time. If you get a drop into the blue area, use a toothpick to scoop it out immediately. Once filled, use a cotton swab and alcohol to do any clean-up.
Make sure that you DO NOT overfill the spaces!

Last, but not least, prepare 15ml of Amazing Clear Cast resin the same way as before. Add in a generous amount of green Color Creator Color Change Powder into the mixing cup and stir the resin mixture well. Give the resin a few minutes to "rest" and allow the bubbles to rise to the top.
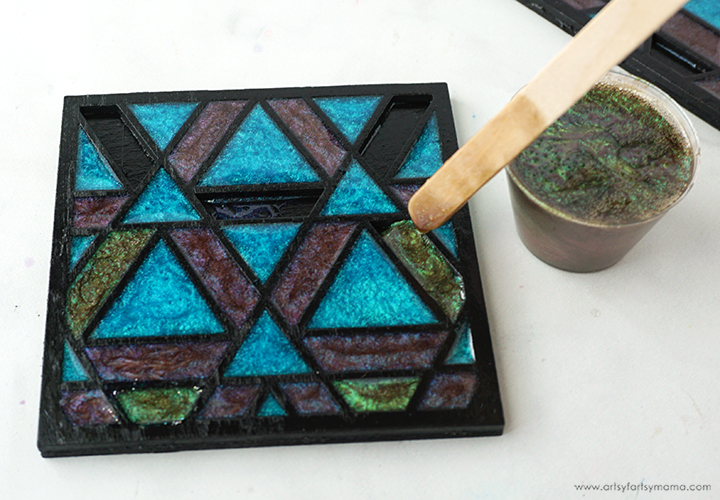
Use the stir stick or toothpick to add green resin to the remaining open spaces in the coaster. Again, work slowly and to add small drops at a time. Use a toothpick to scoop out any spilled drops immediately. Make sure that you DO NOT overfill the spaces!

Let the resin rest for 10-15 minutes, and then pop any bubbles that rise to the top by spritzing with alcohol. Do NOT use a heat gun - especially since the coaster is made of wood. You don't want anything burning by accident! Leave the resin to cure in an undisturbed, well ventilated area for at least 4 hours.

I love how these coasters look like stained glass!! Of course, the coasters are vibrant while on the table, but I wanted to make sure you saw what these Color Change Powder pigments look like when they hit the light. I am blown away by all of that sparkle, and think it's so cool how the colors shift a little as you tilt the coaster in different directions.

Prepare 30ml of Amazing Clear Cast resin according to package directions. Pour in equal parts of resin and hardener to the mixing cup. Slowly stir the resin together with a stir stick for two minutes. If the resin looks cloudy or has any streaks running through it, you need to keep stirring it until it becomes clear. Do not add any pigments.
Use the stir stick to gently bring the resin near the edges of the coaster. To prevent the resin from spilling over the sides, you need to carefully bring the resin to *just* the edge. If you see any drips going down the side, wipe it away immediately.
If you tilt your head or angle yourself to see the light reflecting in the resin, you will be able to see any "bald spots" or areas that aren't covered in the resin top coat yet. Use the stir stick to fill in the areas.
Add enough resin to the coaster so that the entire top is covered, but do NOT overfill. Let the resin sit for a few minutes, then use a straw, heat gun, or spritz with 91% alcohol to remove any air bubbles that rise to the top.
Repeat this process for the rest of the coaster set. Leave the resin to cure in an undisturbed, well ventilated area for 12-24 hours (depending on humidity, it could be longer).

Don't forget to Pin, Like, and Share!
