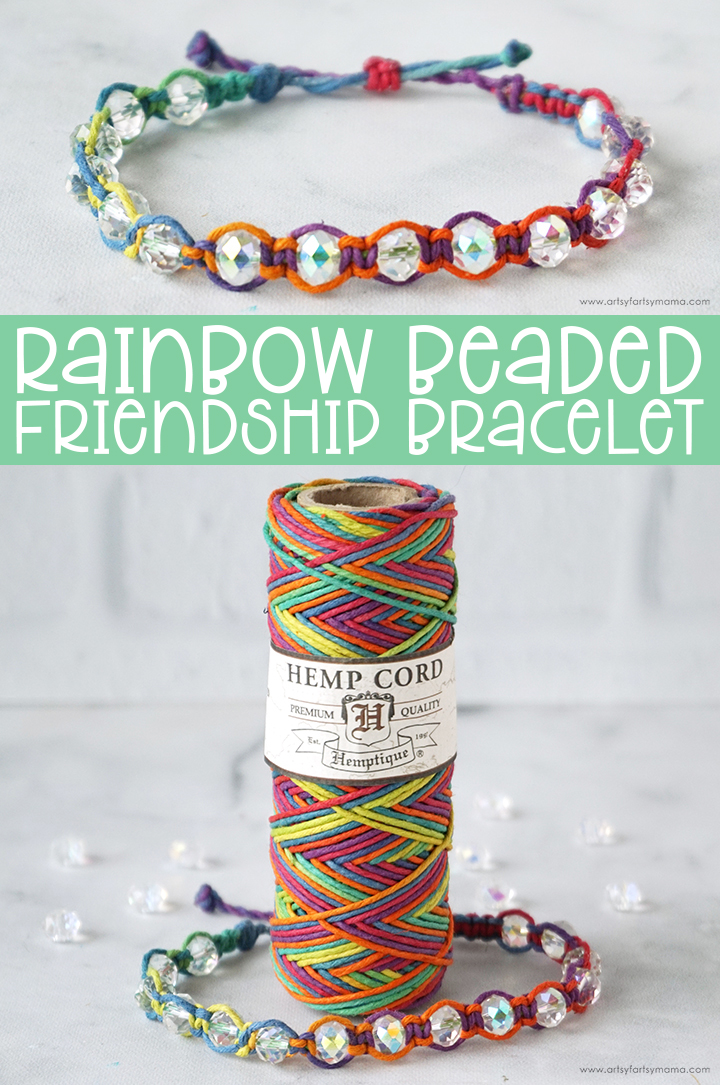
Use easy macrame knots to make a colorful rainbow beaded friendship bracelet!
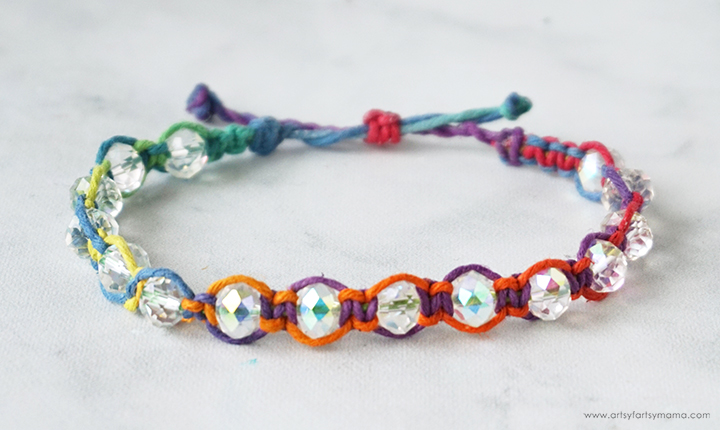
I've been wanting to learn macrame for quite a while now, and decided that making a macrame bracelet would be the perfect project to start with! This Rainbow Beaded Friendship Bracelet is made with colorful rainbow hemp cord from Hemptique, and is so easy to craft with. This is such a fun bracelet for teens to make to share with friends, or for you to make for yourself to add a pop of color to your wardrobe. It can be made to fit any wrist size, and is even adjustable once you put it on your wrist or ankle.

To make your own Rainbow Beaded Friendship Bracelet, you will need these supplies:
- Hemptique Rainbow Variegated Cord
- 6-8 mm Glass Rondelle Faceted Beads
- Scissors
- Ruler
- Tape
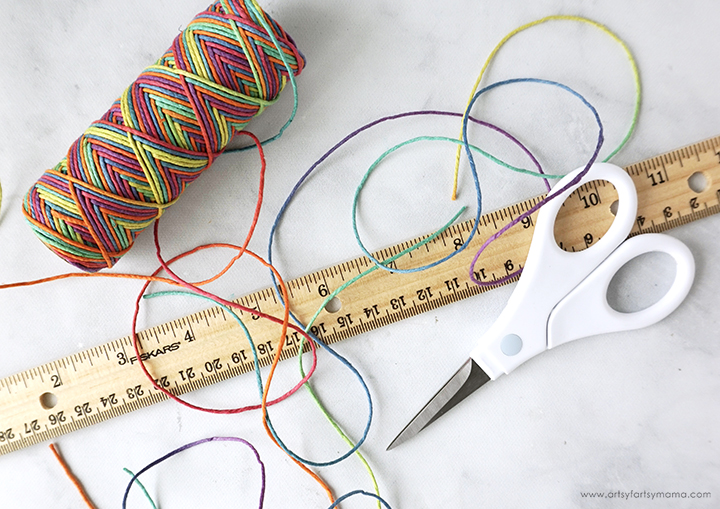
36" - 2 pieces
12" - 1 piece
10" - 2 pieces
4" - 1 piece
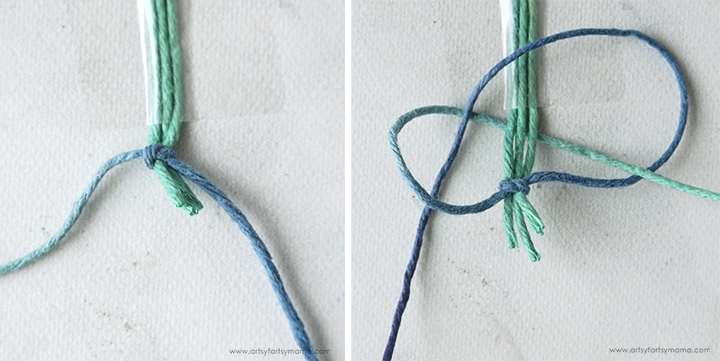
Line up the ends of the 36" cords and the 12" cord, with the 12" in the center. Carefully lay the cords on your workspace with some tape or onto a clipboard with the aligned ends facing down. Select one of the 10" cords and fold it in half, lining the ends up.
Tie a regular knot around the end of three cords and pull it tight. Next, you will need to tie a square knot above the regular knot to keep it secured. To do this, take the cord on the left, and bring it underneath the three cords to the opposite side and lay it over the top of the cord on the right. Bring the right cord over the three center cords, and down through the loop made on the left. Pull both cords to tighten the knot.
Trim the three center cords close to the knot, and seal with some adhesive or clear nail polish to keep the cord edges from sliding out.
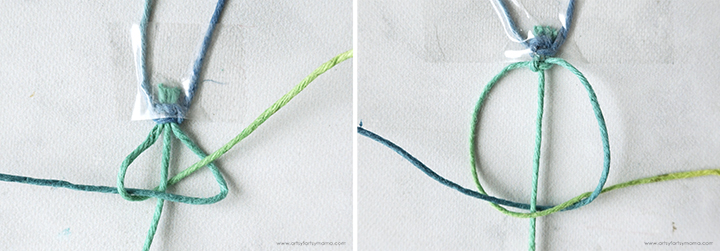
Remove the tape and turn the cord around so that the knot is at the top. Bring the ends up and tape the knot to your workspace. Make sure that the 12" cord is in the center, and bring the other two cords out to each side.
You will need to tie four square knots. For the first knot, bring the cord on the left underneath the center cord to the opposite side and lay it over the top of the cord on the right. Next, bring the right cord over the center cord, and then down through the loop made on the left. Pull both cords to tighten the knot.
For the second knot, you need to tie it in the "opposite" direction. Bring the cord on the left over the center cord to the opposite side and lay it under of the cord on the right. Next, bring the right cord under the center cord, and then up through the loop made on the left. Pull both cords to tighten the knot.
Tie another set of these knots before moving on to the next step.

Now it's time to add some beads! This cord is a little thicker than the floss or string used for traditional friendship bracelets. So before you start your project, make sure that you can easily thread the beads of your choice onto the cord.
To make things easier, I recommend threading all of the faceted beads onto the center cord in this one step as opposed to adding them on one at a time through the process. If the end of your cord becomes frayed or is difficult to thread the bead onto, add a little bit of adhesive or clear nail polish to the end and let it dry.
For this bracelet, you will only need about 15 beads. If you use smaller beads, you will need a lot more of them. You can always add or remove beads as you make the bracelet. Once the beads have been threaded onto the cord, tape the end of the center cord down to keep it tight.
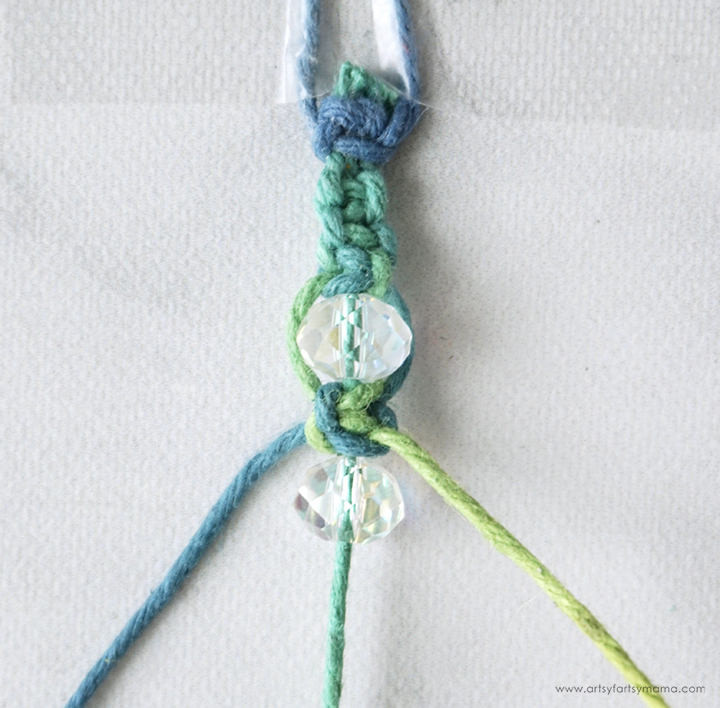
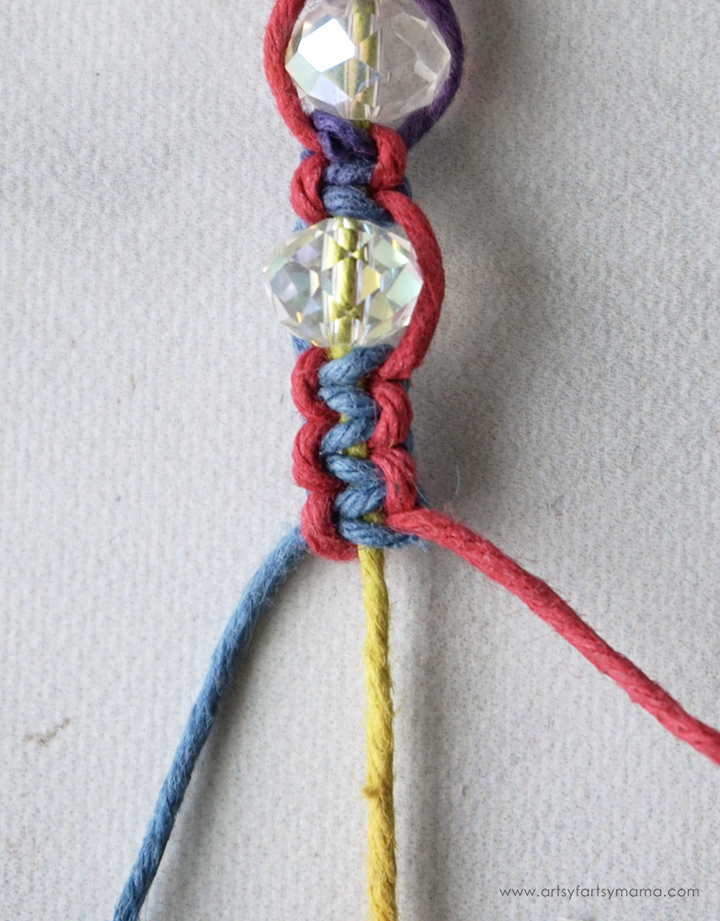
Keep sliding beads up and tying square knots until you get to the last bead. If you make mistakes, it's okay! You most likely won't be able to notice. After the last bead, tie 4-6 square knots to end the bracelet.

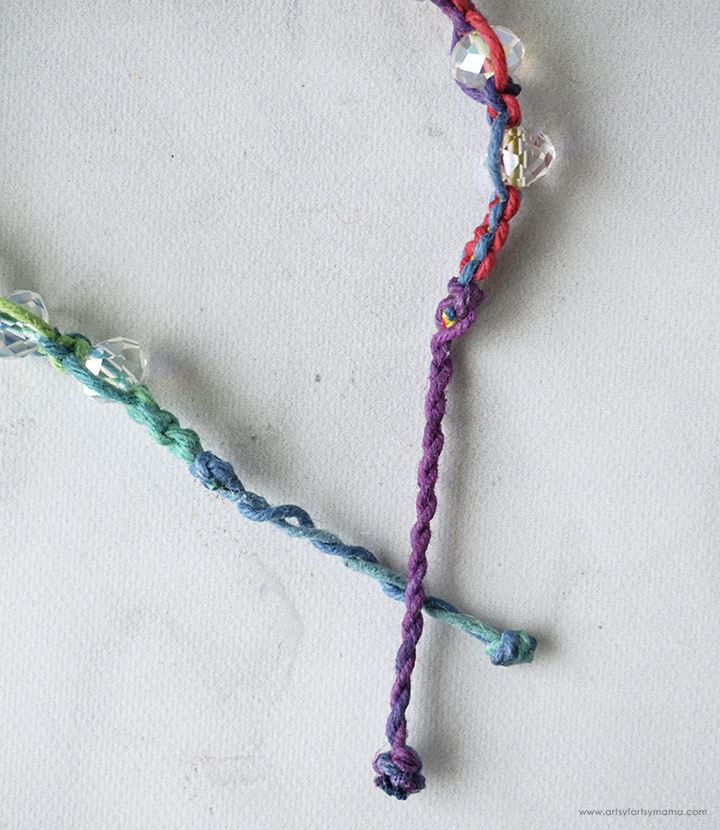
Both ends of the bracelet will have the 10" cord ends hanging loose. Start with one end of the bracelet, and twist both of the cords tightly in the same direction as the cord twists. Twist the two cords together to bring them together into one cord. Tie the end into a knot, and trim the ends. Repeat for the other end of the bracelet. Seal the trimmed ends with adhesive or clear nail polish and let it dry completely.
Ideally, you are going for the look of the purple cord seen in the image above. The blue one is a little loose, but it will still work.


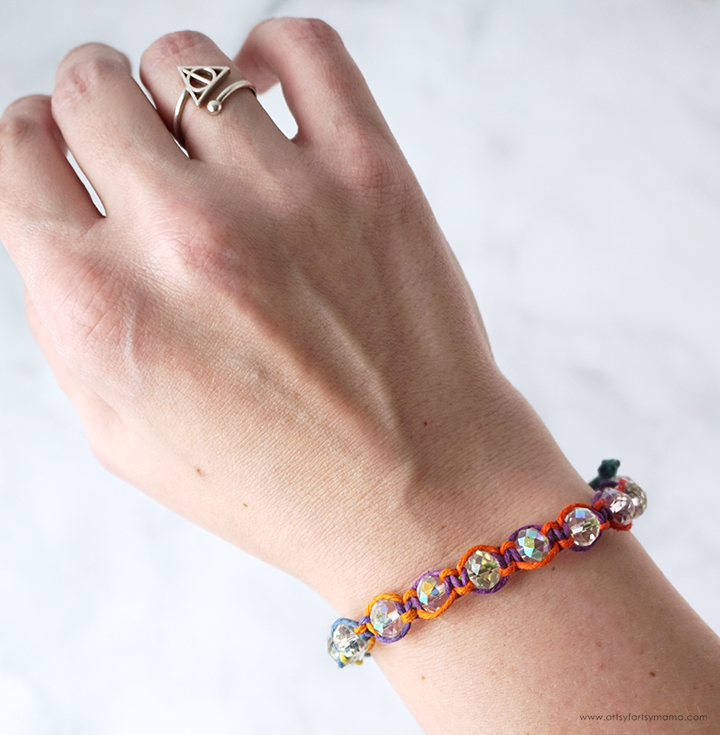
Slide the bracelet onto your wrist, and then pull each end to tighten the bracelet to fit. This bracelet will fit both teens and adults. Use less beads and knots to make one for your smaller friends!

Looking for more Rainbow inspiration?
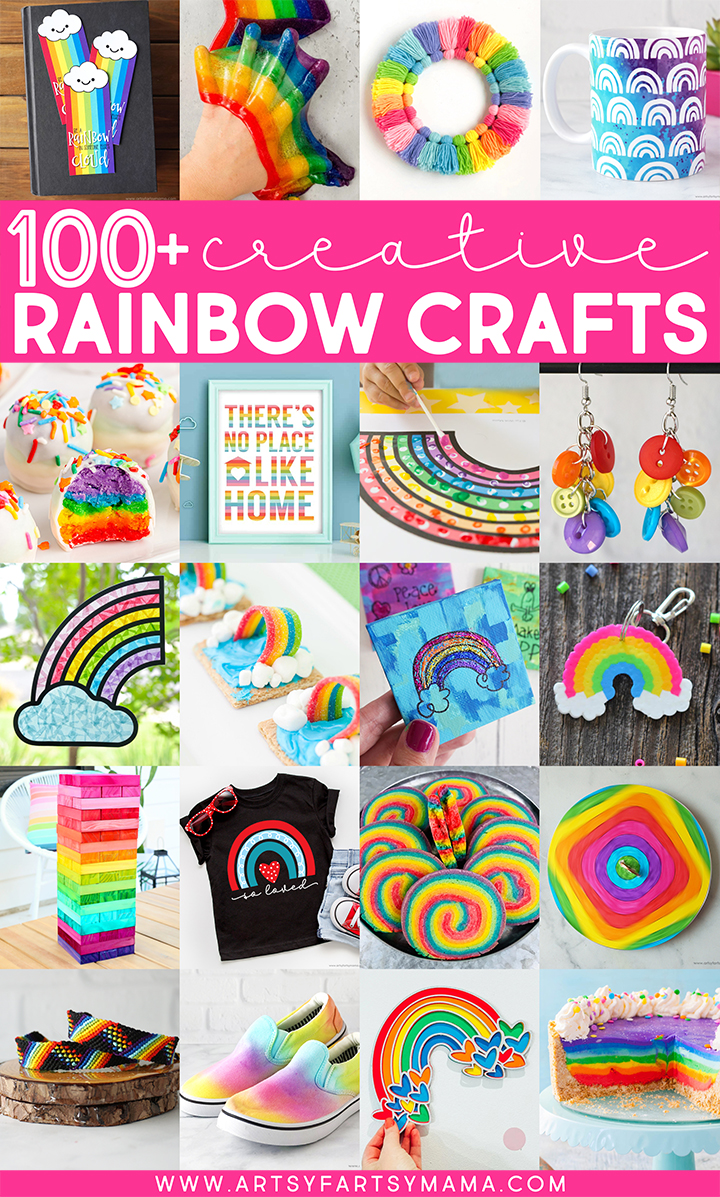
Check out this collection of OVER 100 creative rainbow crafts and recipes!!
Don't forget to Pin, Like, and Share!


Thanks for sharing with us I'm featuring you this week when the next To Grandma's house we go link party starts!
ReplyDeleteThat is so beautiful. I love that colourful thread.
ReplyDelete