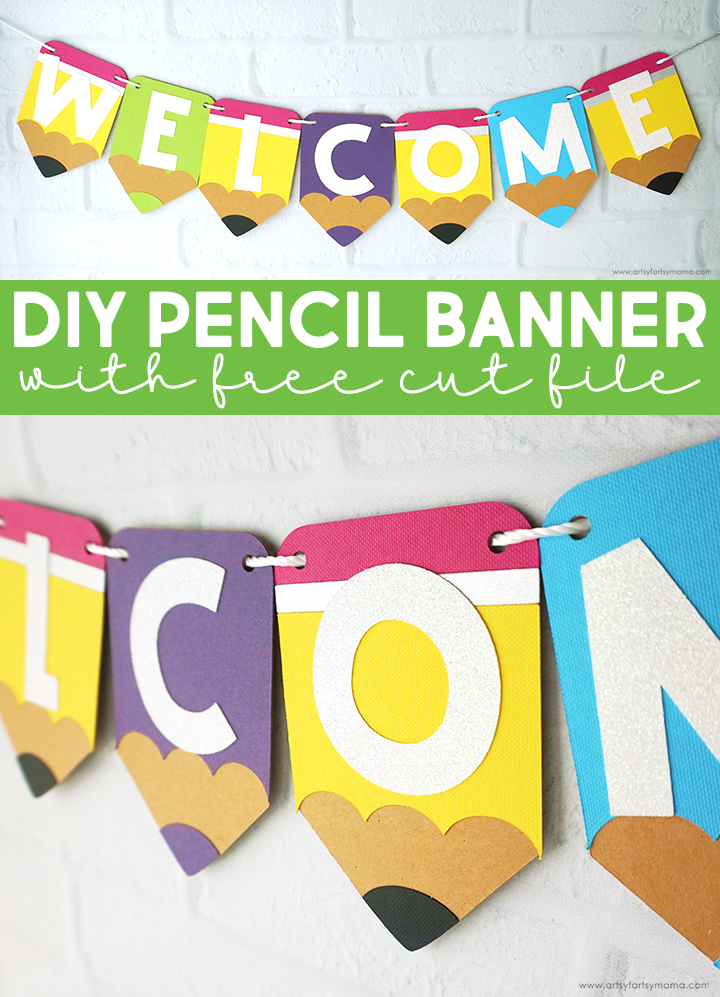
Create a custom Pencil Banner (with FREE cut file) for the perfect school classroom decor!
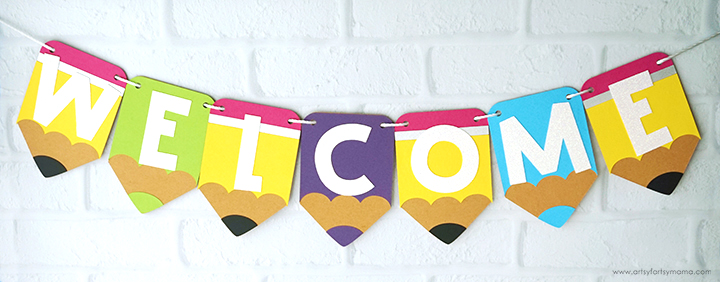
Happy Totally FREE SVG day! This month's theme is banners, with 10 FREE cut files for you to use for practically any occasion. My Colored Pencil Banner design is a great one to use in classrooms, playrooms, or to use as a custom back to school decoration! These banners are so fun and easy to make using your Cricut (or vinyl cutting machine) for parties, home decor, and so much more. I can't wait to see what you create with the designs!

To make your own banners, I would recommend using these supplies:
- Colored Pencil Banner Cut File (for personal use only)
- Cricut Maker or Cricut Explore machine
- Kraftboard (or Chipboard)
- Colored Cardstock
- Glitter Cardstock
- Zig Glue Pen
- Nylon Cord or Twine
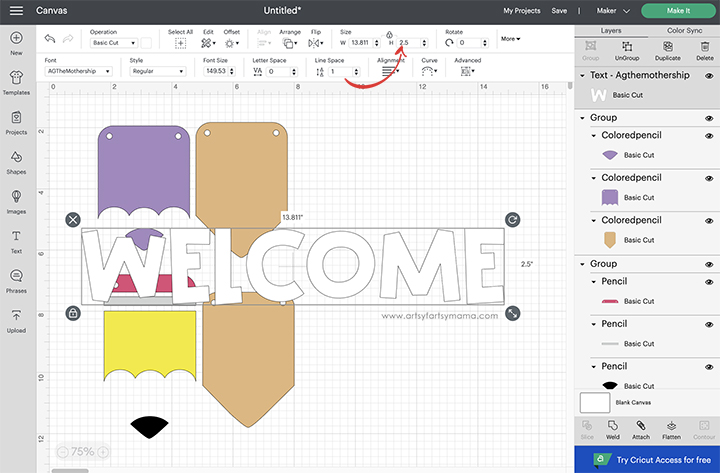
Upload the Pencil and/or Colored Pencil Cut Files (personal use only) into Design Space. They are already sized to 3" wide. If you want to make the banner pieces bigger, make sure to have the entire design selected before adjusting the size.
*Here's a great tutorial on how to upload your own images into Cricut Design Space.
Next, type in the sentiment that you want the banner to say. For example, I made mine into a "Welcome" banner for my husband to hang in his classroom. You can choose any font you'd like, but I recommend something thicker and easy to read. For this size banner, make sure that each letter is no taller than 2.5".
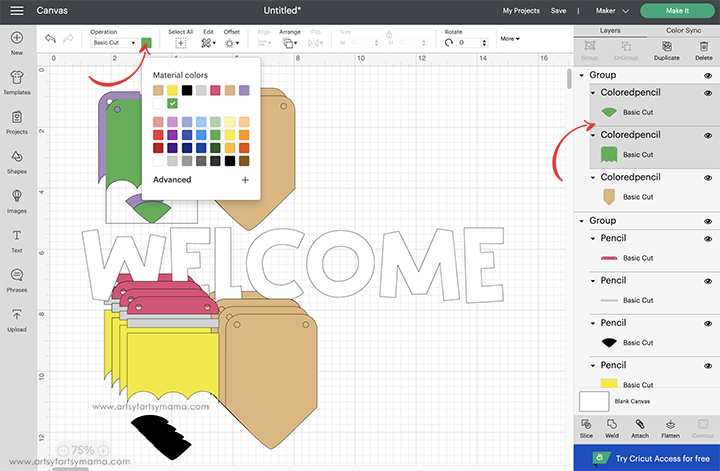
Select each colored pencil or regular pencil and click "Duplicate" in the top right corner to make copies of the banner pieces. To change the color of the pencils, select the pencil lead and pencil top piece in the right menu bar and click the colored box next to the "Operation" drop down menu (refer to red arrows above). You will see a rainbow of colors to choose from.
Once you're satisfied with the changes, click the green "Make It' button in the top right corner.
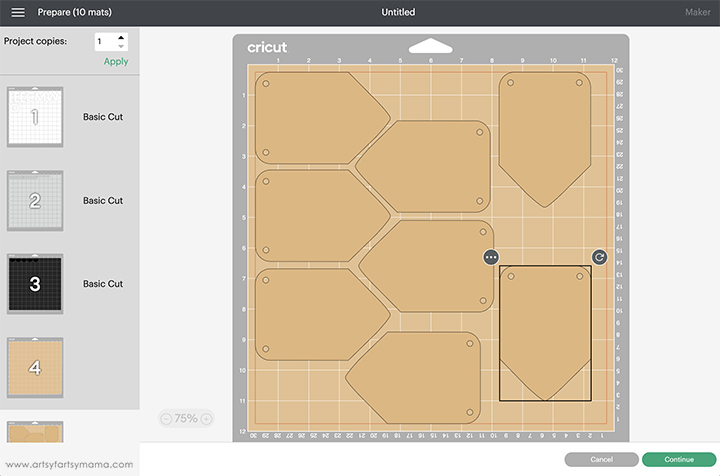
The next step is to see your project arranged on mats by color. Mats are arranged automatically, but did you know that you can move things around? Supplies can be expensive, so to make the most of your kraftboard or chipboard, manually arrange the banner pieces to fit on one mat instead of two.
Select one of the banner pieces, and click the top left circle with the three dots. There, you can move the piece to another mat. To rotate the piece to fit, select the image and click the top right circle with the arrow inside it.
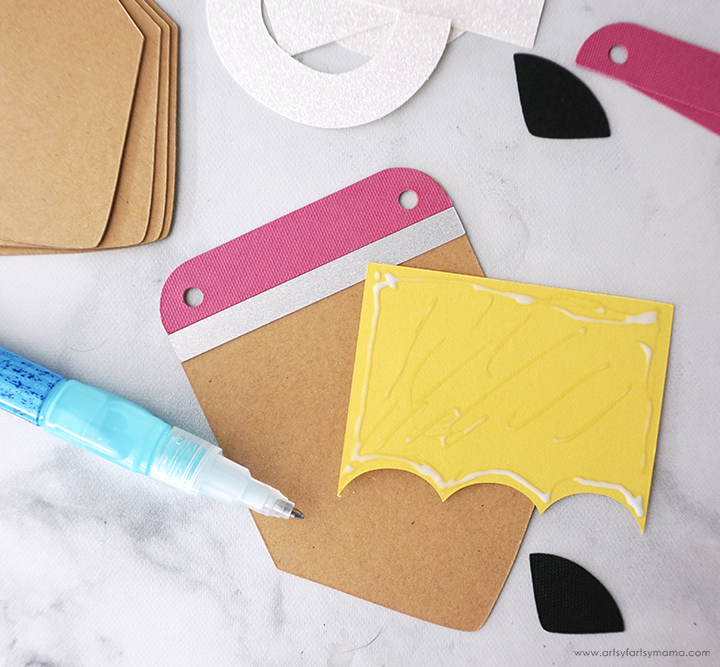
For this banner, I cut the bases out of kraftboard because it adds the brown color for the pencils, and because it's thicker than cardstock so I know the banner will last a long time. For the pencils, I used colored cardstock: yellow, pink, and gray for regular pencils, and one color each for colored pencils. To add some sparkle and texture, I used white glitter cardstock for the banner letters.
To assemble the banner, you will need a good paper adhesive. Personally, my favorite one is a Zig Glue Pen. It's easy to use, holds strong, dries quickly, and doesn't wrinkle the papers at all. Turn the paper over and draw a thin line of glue along the edges of the papers. Starting with the pink piece, line up the holes and the top edge of the base and press the papers together until the glue sets. Work your way down and add the "lead" piece on last.
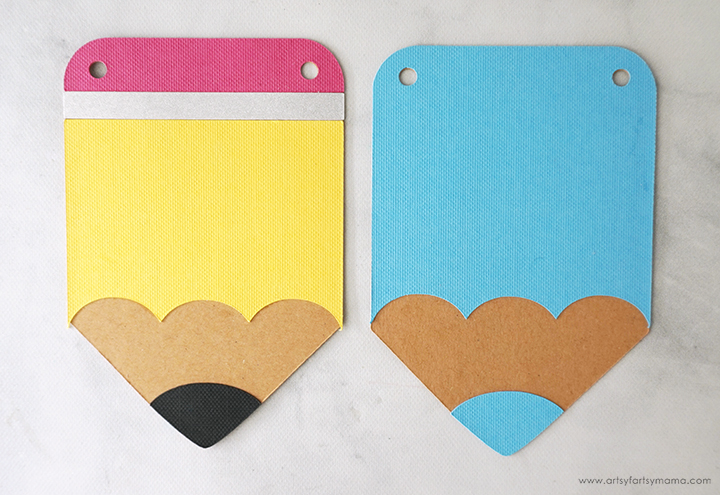
Don't you think these banner pieces are so cute? I love how simple they are to cut and put together, and how you can change the colors up to match any classroom decor. You can make a banner of just pencils or colored pencils, or change things up by alternating them for a different look.
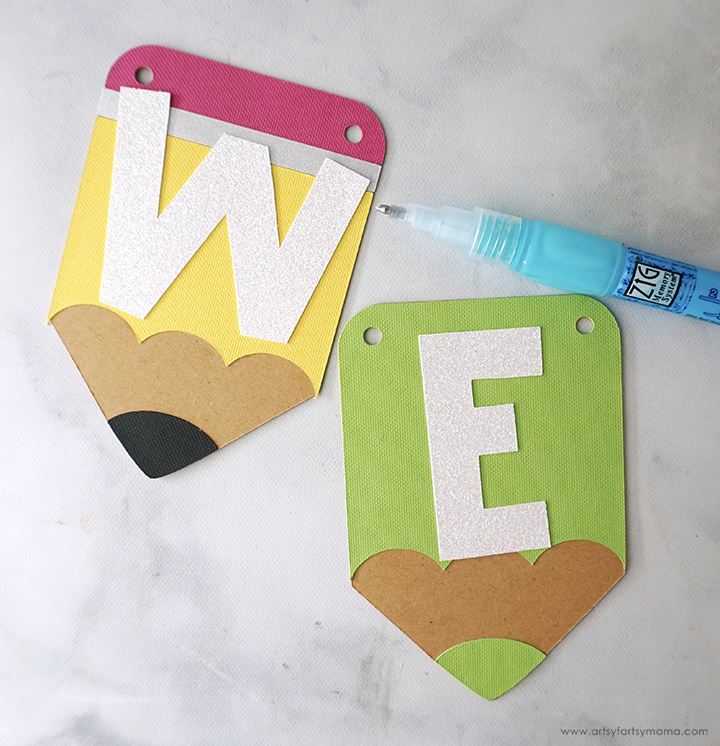
Decide how you want to arrange the banner pieces, and then use the glue pen to attach the letters to the pencils. Make sure to press the papers down well and hold in place until the glue sets.
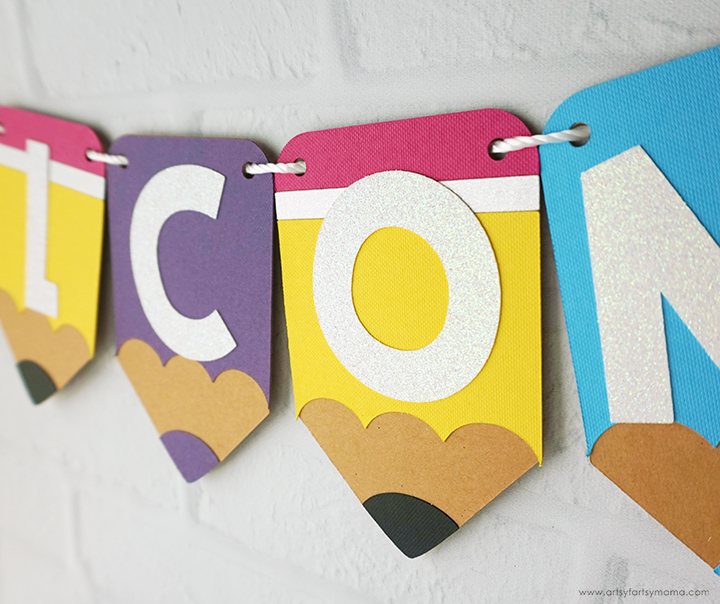
Thread some nylon cord or twine through the holes in the banner pieces, leaving a few inches of length at each end of the banner.

What do you think of this Colored Pencil Banner? The banner is so simple to put together, and would look so cute in a classroom or even a kids bedroom! As always, I would love to see your creations! Share your creations on Instagram, Facebook, or leave a comment/photo on the project pin on Pinterest! #AFMCrafts
Don't forget to Pin, Like, and Share!
As promised, here are all 8 FREE Banner Cut Files that we have created to share with you!
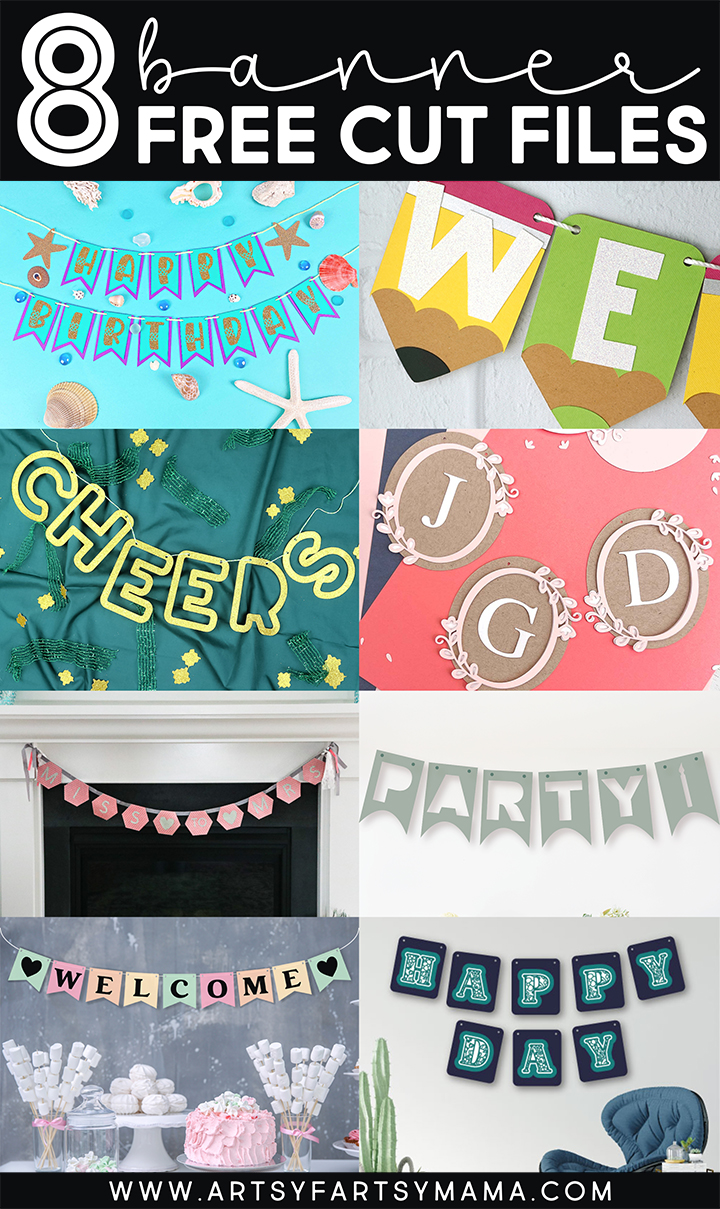
Download each of the cut files by clicking through the links below, and then use your Cricut or other cutting machine to make your own custom banner creations!
1. Mermaid Birthday Banner - Hello Creative Family
2. Colored Pencil Banner - Artsy-Fartsy Mama (you are here)
3. Cheers Banner - Mad in Crafts
4. Floral Circle Alphabet Party Banner - 100 Directions
5. Miss to Mrs. Banner - That's What Che Said
6. Party Banner - Everyday Party Magazine
7. Welcome Banner - Happiness is Homemade
8. Happy Day Banner - Crafting in the Rain
I hope that you have a wonderful time using these SVG files! There are so many things you can make with them. If you create any projects using the files, we'd love to see them! If you share your projects on Instagram, use the hashtag #totallyfreesvg.
Did you miss our past collections? Grab all of the Totally Free SVG Cut Files here!
What banner designs will you use first?


Hello what’s the name of the letters? Thank you !!
ReplyDeleteThis is such a cute banner, but the code to get it free doesn't work. Can this be fixed?
ReplyDeleteWhich banner are you trying to download? The Pencil Banner in this post does not require a code.
Deletethere is no link to download the pencil banner
ReplyDeleteThe link is in the list of supplies needed.
DeleteHOLA MUCHAS GRACIAS ME ENCANTA LA IDEA, QUIERO HACERLO...PERO EL ARCHIVO NO LO PUEDO ABRIR ...AYUDA POR FIS
ReplyDelete