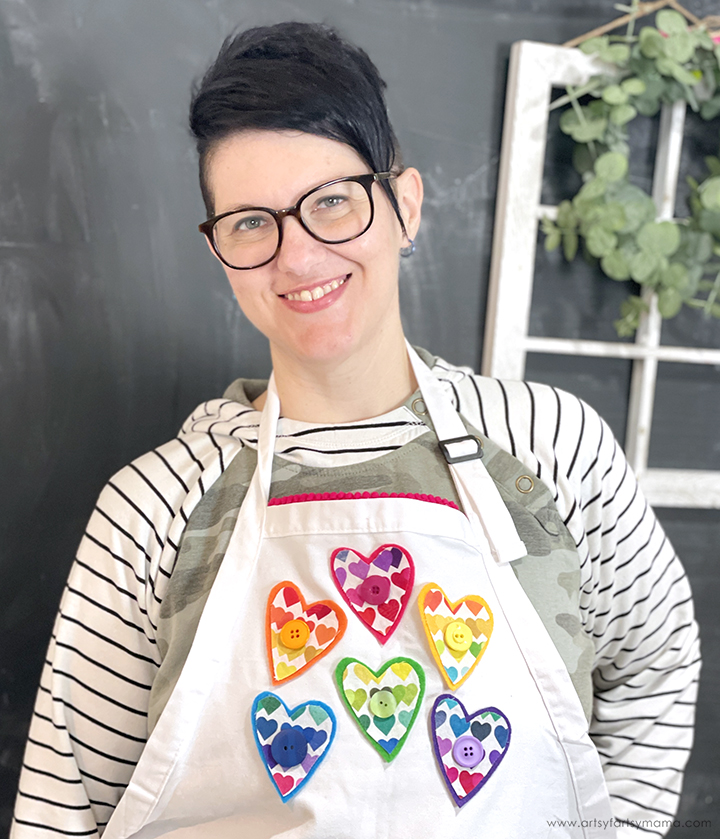
Customize a plain apron with a no-sew set of rainbow hearts!

Don't you just love no-sew projects? I sure do! Using glue, a simple apron base, colorful fabric and felt, you can create a no-sew piece of fashion to wear in the craft room or in the kitchen. It really is that simple, and I'm even sharing a FREE template for you to use to make it even easier. So what are you waiting for? This is such a quick and easy project for crafters of all ages and skill levels!

To make your own Rainbow Heart Apron, you will need these supplies:
- White Apron
- Heart Template (personal use only)
- Felt Sheets - red/pink, orange, yellow, green, blue, purple
- Rainbow Heart Fabric
- Scissors
- E6000 FabriFuse
- Buttons

Use the outer Heart Template to cut one heart out of each color of felt. Next, use the inner heart template to cut one heart out of the rainbow heart fabric. My fabric pattern has hearts shaded in the different colors, so I aligned the template to coordinate with each color. Depending on your fabric pattern, you could do something similar.

Add a little bit of E6000 FabriFuse to the back of the fabric pieces. When I say a little bit, I mean a very thin, even layer. Make sure not to add the glue on too thick, or it can seep through the fabric - especially with white fabric. You can kind of see what I mean with the glue coming through on the green heart. Even if the glue seeps through, don't panic. It does dry completely clear and is hardly visible once completely dried.
Center the fabric hearts on the coordinating felt hearts. Gently tap the fabric down with a fingertip as opposed to really pressing the two together. This will help to not force the glue to not absorb through the fabric. The glue bonds permanently, but will have a permanent hold once completely dry.

Arrange the hearts on the apron. Once you find a layout that you like, turn the hearts over one at a time and apply E6000 FabriFuse to the back. Since felt is a bit thicker, you can use a little more glue than on the fabric.
Turn the hearts over and press them down onto the apron. Hold them in place, especially around the edges, until the glue sets. If you have any edges pop up, add a little more glue and press it down again.

For some added texture, choose some fun-shaped buttons in coordinating colors to add to the apron. Add some glue to the buttons and center them on the hearts. Let them sit in place until the glue has dried. If you want to add thread through the buttons, you can sew right through the hearts and buttons once the glue has dried!

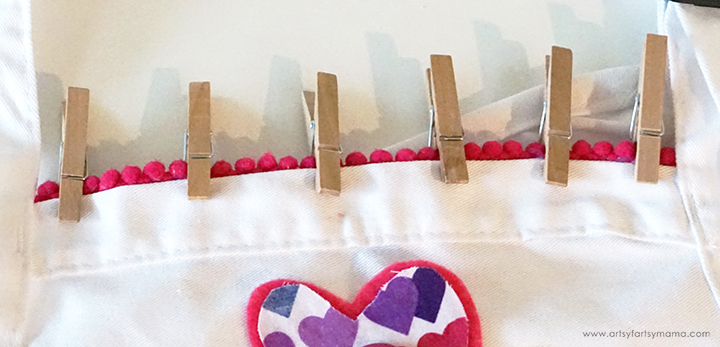
Last, but certainly not least, cut a length of pom-pom trim in any bright color to fit along the top edge of the apron. With the pom-poms on the top, add some glue to the flat bottom section of the trim. Line the trim along the backside of the apron so that the poms are peeking over the top edge. Use clothespins to hold the trim in place until the glue sets.

Once the FabriFuse is completely dry, the apron is ready for wearing! This is such a fun apron to keep your clothes protected while crafting, baking, gardening, and so much more. It would also make a great gift for a crafty friend. When the apron gets dirty, you can simply toss it in the wash! FabriFuse is totally washable, and stays flexible so you don't need to worry about your project coming apart afterward.

Once you start creating with FabriFuse, there is no limit to what you can make with it! Team Creative Crafts took on the challenge, and I love how we made similar projects that are actually so different. Laura's Girl Scout Tote Bags are not only great for cookies, but can be used to carry almost anything. Beth's creative Butterfly Flour-Sack Towel Set will add a touch of color to any kitchen, and would make a unique housewarming gift!

Don't forget to Pin, Like, and Share!


Well this is simply stunning.
ReplyDelete