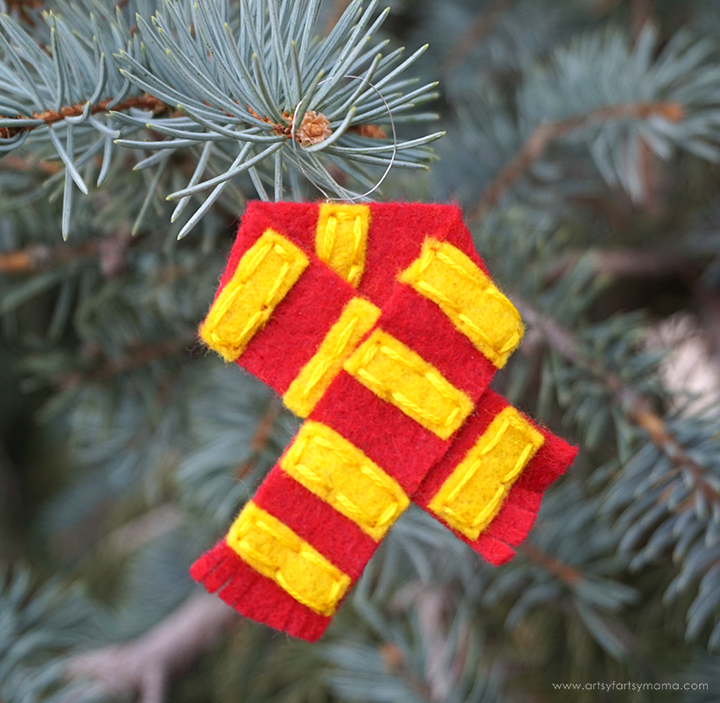
Create handmade Hogwarts House Scarf Ornaments to hang on your Christmas tree!

I'm currently giving my Christmas tree a magical makeover to a Harry Potter theme, and I couldn't be more excited about it! I was recently in Florida visiting the Wizarding World of Harry Potter, and was so inspired that we decided to do some crafting in the hotel room. These Hogwarts House Scarf Ornaments are such a simple craft and are a fun way to add some House pride to your decor.

To make your own Hogwarts House Scarf Ornaments, you will need these supplies:
- Felt Sheets: red, green, blue, yellow, gray, black
- Embroidery Floss: yellow, gray (try to match with felt)
- Embroidery Needle
- Fabric Adhesive
- Scissors
- Craft Wire

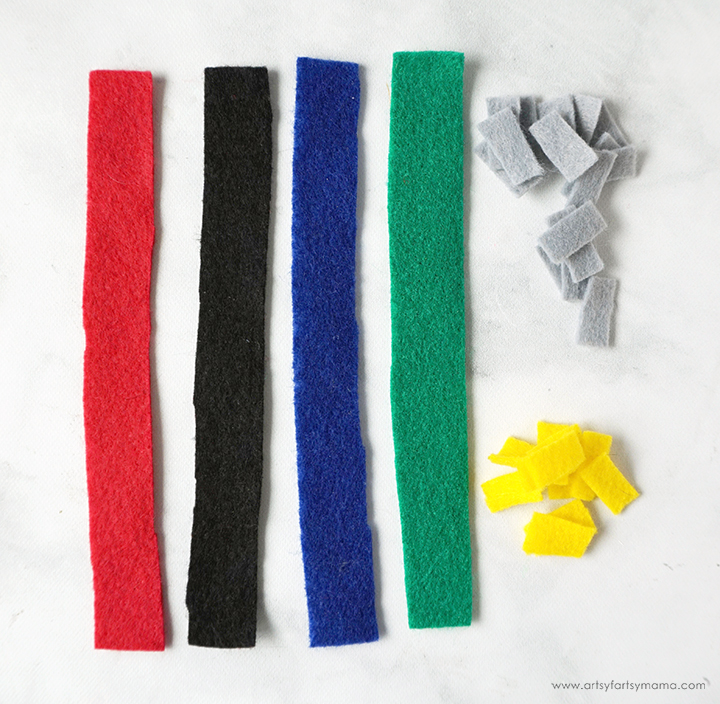
Cut one 6.5" x 3/4" strip from the red, black, blue, and green felt sheets. They don't have to be perfect! Just do your best. Next, cut a 3/4" wide strip from the yellow and gray felt and then cut sixteen 1/4" pieces from both of the strips (32 total).

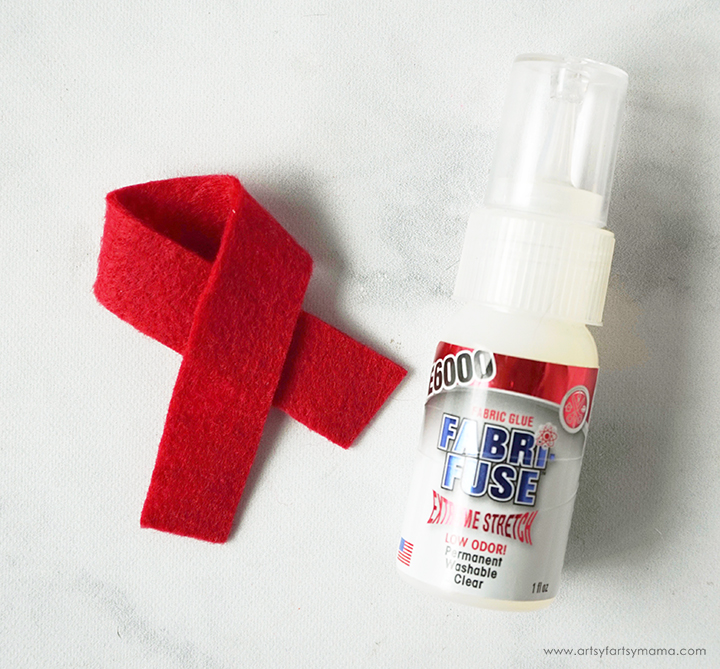
Fold the strip of felt like how you would wrap a scarf around your neck, which kind of resembles an awareness ribbon. Use small dots of fabric adhesive to hold the felt in place.

Cut a 12" length of embroidery floss and split the strings in half. Tie a knot at the end of the floss and thread the other end through the needle. Place one of the small rectangles onto the scarf, a little bit above the end of the felt, and sew it into place with the floss using any stitch you are comfortable with. Keep the thread attached, and sew the next rectangles onto the scarf. When you get close to the end of your floss, tie it off and cut. Thread the needle with the other piece of floss and keep stitching, if necessary.
Use small scissors to carefully cut 6-7 times into the ends of the scarf, right up to the rectangle. This will give the scarf some fringe. Be careful not to cut into the rectangle or the floss.
There will be four rectangles going up the front end of the scarf. The underside of the scarf will have one near the end (leave space for fringe), and one near the fold. Cut one rectangle in half and sew it right next to where the top overlaps so that it looks like it's partially covered. Lastly, add a rectangle to the back section of the scarf, with the bottom edge hiding underneath.

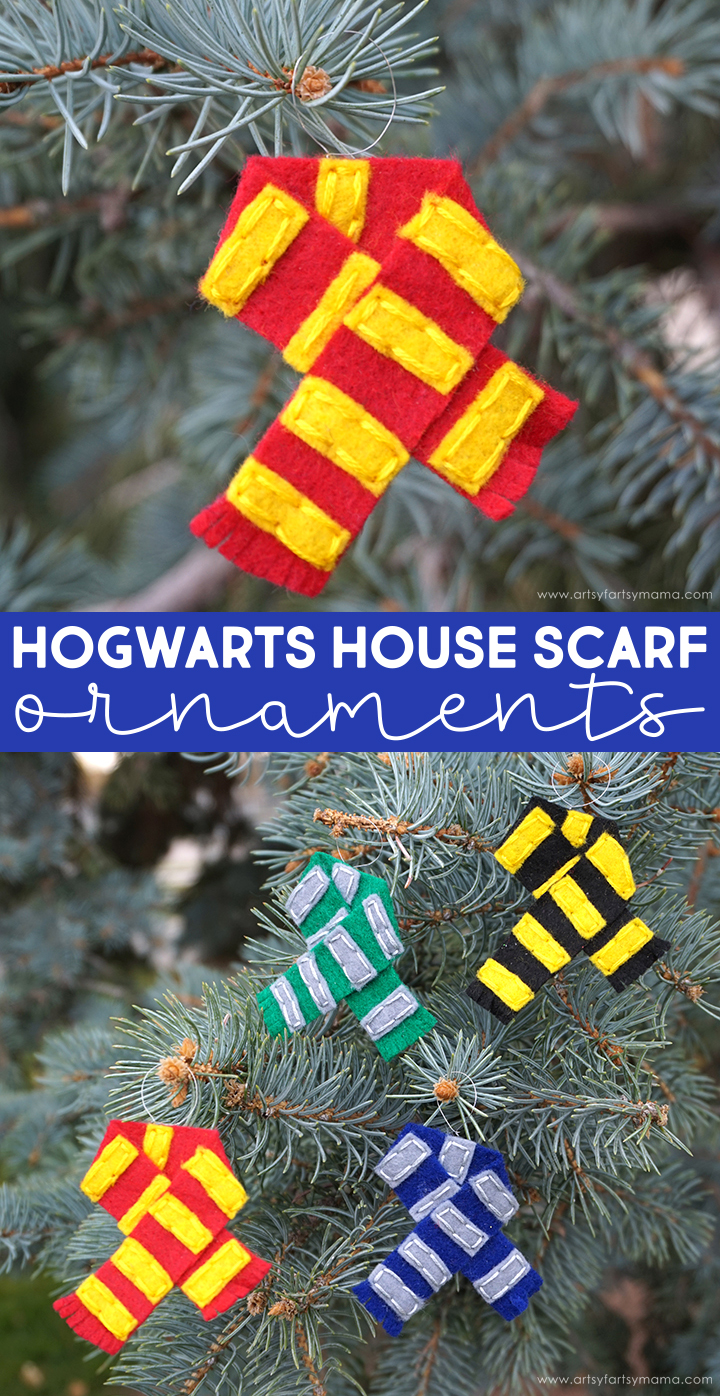
Repeat the process to make a scarf to represent each Hogwarts House, and make multiples of each if you are putting them onto a Christmas tree
If you aren't sure of House colors (no judgement), here's the list:
Gryffindor: red + yellow
Hufflepuff: black + yellow
Ravenclaw: blue + gray
Slytherin: green + gray

To transform the scarf into an ornament, I used some craft wire. Cut a short length (3" or so) of the wire and wrapped the center around your finger. Next, twist the ends together to make one long piece. Poke the end through the floss threads on the back of the scarf with the circle poking out the top, and fold the lower wire over itself to secure the wire in place. Use some adhesive for a stronger hold.


The best part of Fall is the weather. I live in the desert so the sunshines 360 days a year baking everything, we also have terrible wind. It disappears in the fall. Plus the addition of Pumpkin Spice.
ReplyDelete