Download this Rainbow Mug Wrap Cut File to create gorgeous sublimation mugs!
Sublimation is all the rage right now, and I think it's so exciting! There are so many things you can create with
Infusible Ink, and creatively designed mugs are one of the newest trends. If you've been wanting to try your hand at mug-making, you're in luck! We're sharing 13 amazing mug wrap cut files to make your own incredible mugs, including my Rainbow Mug Wrap design! I'm also sharing a cool trick on how to use your oven to make mugs if you don't have a
Mug Press yet!!
To make your own Infusible Ink Mug, you will need these supplies:
To create your own custom mug wraps in Design Space, start by searching for "blank mug" in project search. Find the "Mug Design Setup" project, which should be free with a Cricut Access subscription. While you're here, you might as well click on the little star on the bottom right of the project to save it to your "Favorites" list so that it's easy to find again later!
Before getting started on the project, you need to choose the mug blank size you'll be using from the dropdown menu. There are also edge design options to choose from: straight, ripped, scallop, wavy, or zig zag! For this project, I selected the
12 oz mug blank with the straight edge. Click "Customize" to get started.
The mug design opens with three layers: one in pen with placement instructions, the teal mug wrap, and the outer mug wrap. Delete (or hide) the pen layer. Upload the Rainbow Mug Wrap cut file into Design Space. It should already be the perfect size for the mug template. Select everything - the uploaded image, and both mug wrap template pieces and click Align > Center in the top menu to line everything up.
With everything still selected, click Attach in the bottom right menu. Next, click the green "Make It" button in the top right corner.
When weeding
Infusible Ink, use your fingers instead of weeding tools. If you peel away the rainbows (like I did), you will have a more solid-colored mug with white rainbows. If you do the opposite, your mug will be mostly white with colorful little rainbows all around the mug!
I kind of love that you can potentially use this design for two coordinating mugs! Peel away the large part of the design first and set it aside. Press the rainbows onto one mug, and then place the large part back onto the carrier sheet and then press it again on another mug. Boom! Pair of coordinating rainbow mugs!
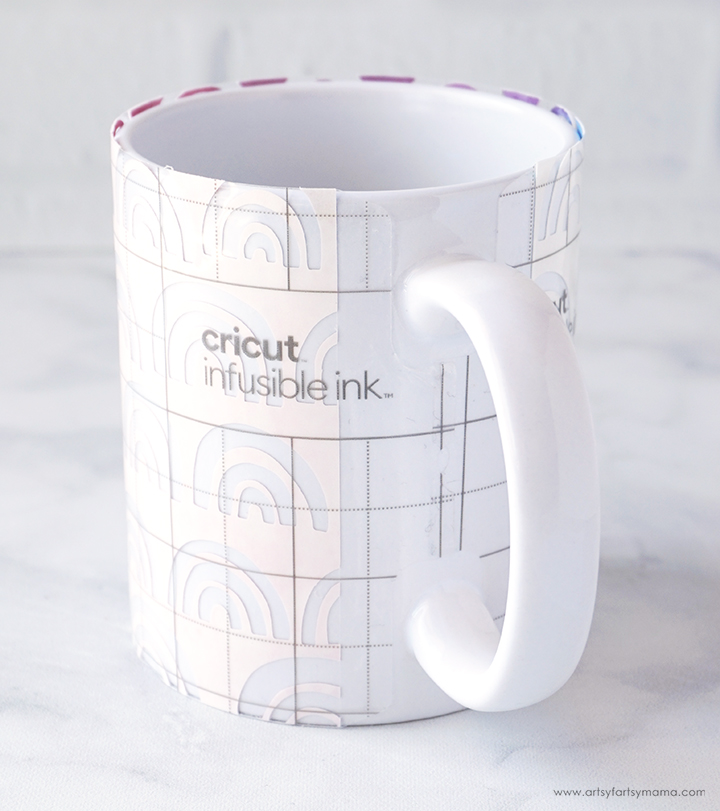
Place the
Infusible Ink wrap evenly around the mug. The carrier sheet is sticky, so press it down well to keep it in place.
Use an Oven for Infusible Ink Mugs
Instead of using a press, I wanted to try and see if I could successfully make a mug using the oven. Prep the mug following the same instructions up to this point. Wrap the mug in a
silicone mug wrap OR wrap it tightly all the way around the mug with more
heat resistant tape. The key is to have all of the
Infusible Ink held tightly against the mug, otherwise your design could come out looking blurry.
Place the mug on a baking sheet, and bake it in the oven (NOT a toaster oven) at 400º for 15 minutes.
No matter which way you applied heat to the
mug, let the mug cool
completely (about 20 minutes) before touching it. This is very important to prevent burning yourself and to not ruin the project.
Isn't this
mug SO beautiful? I am in love with it, and am SO happy with how it turned out!! I definitely recommend using a brightly colored
Infusible Ink sheet with this design, since it's rainbows after all!
*If you look closely around the rim of the cup, you can see a couple of blurry areas. This is what I meant when I was talking about the design not being held tightly against the mug.
The other side of the mug is just as colorful, and just as beautiful!! I would love to hear what you think about the design and what kinds of
Infusible Ink patterns you want to use with it on your own
mugs!!
Here are the edges of the design next to the handle of the
mug. This is the straight edge, but like I said, you can choose from a bunch of different options in the Mug Design project template.
**Cut files are for PERSONAL USE only**
As promised, here are all 13 FREE Mug Wrap Cut Files that we have created to share with you to make your own amazingly creative mugs!


Beautiful mug! LOVE the colors!
ReplyDeleteAlexandra
EyeLoveKnots.com
OnRockwoodLane.com
Thanks so much for the change to win!! Would absolutely love to win this mug press.
ReplyDeleteI would love to win the mug press to make mugs for my children (12) and grandchildren (24). Thank you for the opportunity!
ReplyDeleteThanks! Looks so easy to use.
ReplyDelete