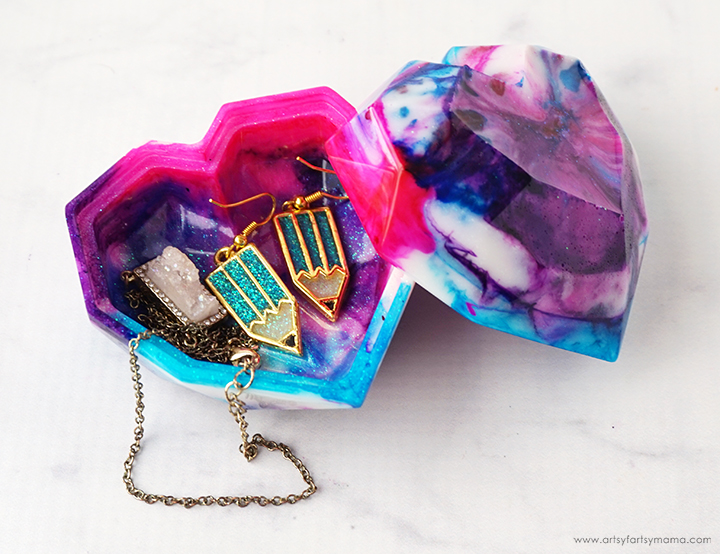
Create a Tie-Dye Trinket Box using resin to store your jewelry pieces and tiny trinkets!

I'm excited to share a new and colorful resin project for you to try! This was a different technique that I've been wanting to try for a while, and I was not disappointed! If you like the look of tie-dye and want a worry-free resin project to try, this resin trinket box is a great project. It's a fun one for beginners, and is a creative way to add a bright pop of color to your nightstand, vanity, or desk.
New to resin? Be sure to check out Resin 101: Getting Started with Resin!

To make your own Tie-Dye Resin Trinket Box, you will need these supplies:
- EasyCast Clear Casting Epoxy
- Measuring Cups
- Stirring Sticks
- Disposable Gloves
- Diamond Heart Box Silicone Mold
- Alcohol Inks
- Castin' Craft Opaque Resin Dye - Pearl/White
- Fine Glitter – iridescent white
- Silicone Mat (optional)
*Save 10% on resin supplies when you shop ETI with code AFM
Before you get started, protect your workspace with a silicone mat. Be sure to work in a well-ventilated area and wear disposable gloves. Prepare about 3 oz EasyCast Clear Casting Epoxy according to package directions. Pour in equal parts of resin and hardener to the mixing cup. Slowly stir the resin mixture together with a stir stick for two minutes.
Pour the resin into a clean mixing cup. Add a drop of pearl or white opaque resin dye and sprinkle in a generous amount of white iridescent glitter. Stir the resin mixture again for another minute or two with a clean stir stick until evenly incorporated.

The Heart Box Silicone Mold comes with two pieces: the box and the lid. Make sure that both of the molds are clean, dry, and that there isn’t any lint or dust hiding in the folds.
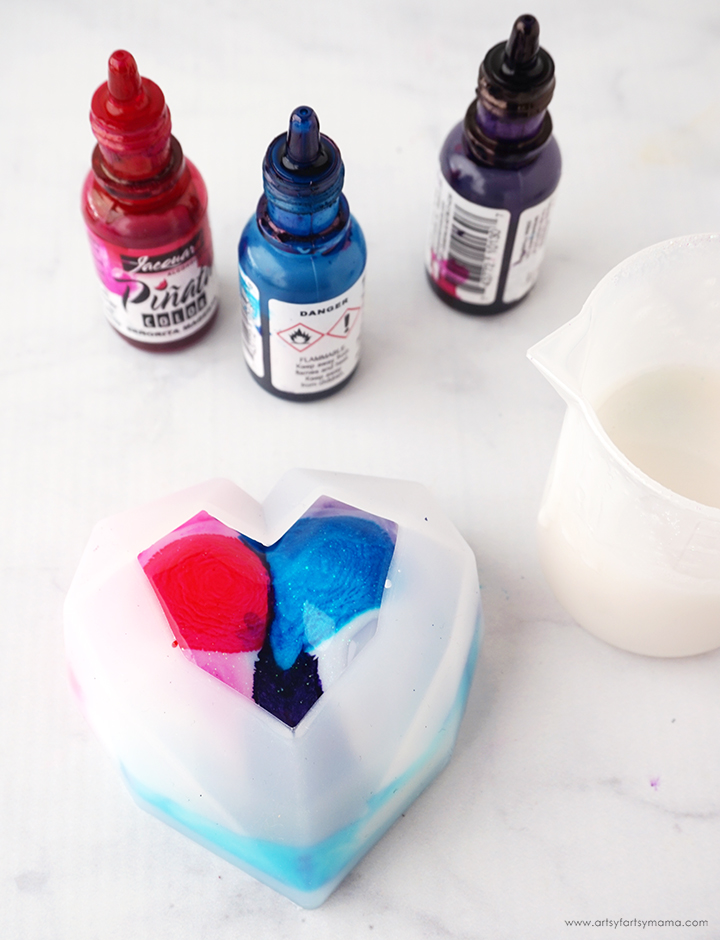
Choose 2-3 coordinating colors of alcohol ink. Try not to pick colors that will look muddy when combined (ie: pink/green, purple/yellow, blue/orange). Carefully add one drop of each color into different parts of the mold*.
*This technique will most likely stain your mold permanently. Don't worry though - the mold will still work great for future projects!

Pour some of the resin into the mold, right over the alcohol ink drops. Pour slowly until the mold is filled about halfway. Gently squish the molds a little to move the resin around (especially around the bottom edges) to bring any bubbles to the top.
Add another drop of each color ink into the mold. The colors don't have to be in the same place as they were originally.

Fill the mold up the rest of the way. Repeat the process for the second mold. Pop any bubbles that rise to the top using a lighter, heat gun, or by blowing through a straw. You could also lightly spritz the molds with 91% alcohol to remove bubbles.
Leave the resin to cure in an undisturbed, well ventilated area for 24 hours. You will know that the resin is completely cured when it is no longer tacky to the touch.

Carefully remove the trinket box and lid from the molds. Use scissors to cut away any over-poured resin and lightly sand down any rough edges. Look how gorgeous the inside of the box is! I love the tie-dye look, and especially love the sparkles shimmering through!!

Place the lid on the box and make sure that it fits perfectly. If the the resin is a little soft when removing it from the mold, the lid won’t fit right. However, if you do this step right after removing it from the mold, it will move right back into place! Let the box sit closed (if it is still a little flexible) for another 12 hours or so to finish curing.

Fill the Tie-Dye Resin Trinket Box with your favorite pieces of jewelry or small trinkets. Place on a nightstand, vanity, or give it as a gift! You will love just how easy this is to make, and it's such a fun technique! Who would you make this project for?
I would love to hear what you think about this project and what color combinations you would use. I hope you enjoy this project, and as always, I would love to see your creations if you decide to make it yourself. Please share your projects and tag me on Instagram, Facebook, or leave a comment/photo on the project pin on Pinterest!
Be sure to check out these other resin craft ideas:
Don't forget to Pin, Like, and Share!


