Color some Free Printable Birthday Gift Boxes to make a one-of-a-kind birthday gift!

This Free Printable Coloring Birthday Gift Box is fun to color and easy to assemble. Plus, your gift (even if it's last-minute) will have that handmade touch that everyone loves to receive! The boxes have a top and a bottom piece that fit together beautifully to hold smaller items like gift cards, jewelry, treats, and more for teachers, school friends, and co-workers!

To get started, print out the Birthday Gift Box printable on cardstock. You will also need a variety of crayons, colored pencils or markers. Color the box design in any bright colors you want. Most importantly, have fun and take some time to relax!
Some things you should know before downloading:
*Artsy-Fartsy Mama printables are for PERSONAL USE ONLY (home, school, libraries, etc).
*You may NOT modify, re-sell, redistribute, or claim the design as your own.
*Please do not remove the credits/watermarks.
*If you'd like to share this project, credit must be given to Artsy-Fartsy Mama & linked back to this post.

Cut the box templates out by following the outer guidelines using a paper trimmer.

Use scissors to cut the solid lines on the tabs, and then use a scoring tool and a ruler to score all of the dashed lines on both the top and bottom box pieces. Scoring the paper before folding will help prevent cracks and crooked folds.
Fold along the score lines gently with your hands, then use your fingernail or a credit card to press down firmly on the fold and slide across the fold. Repeat for all of the score lines.

Use some quick-drying glue or double-sided tape to assemble the boxes. On the bottom box, place the adhesive on all four tabs, then fold them into the center. Hold the tabs in place until the glue has set.
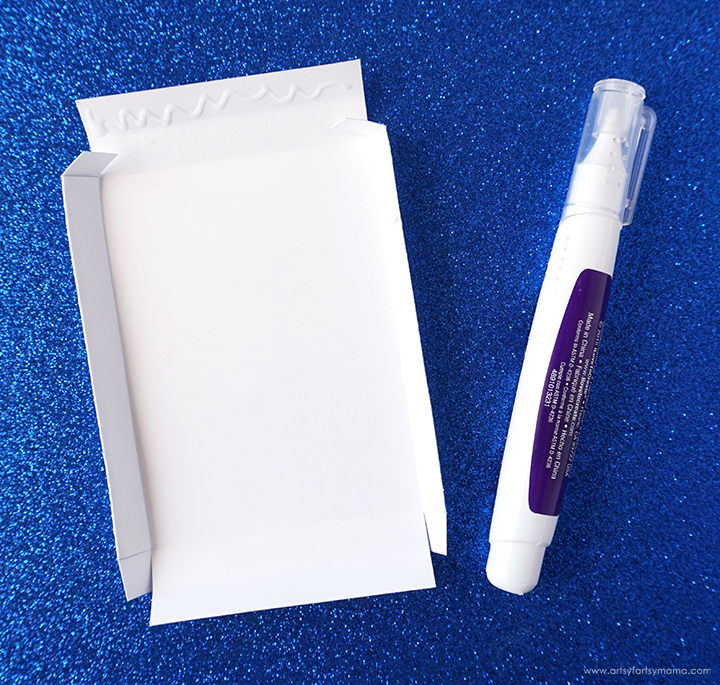
For the top, add some adhesive to both of the long sides of the box. Fold the edge over along the first score line. Press down well so that the paper sticks together. Next, fold those longer sides up and fold the tabs in. Add some adhesive to one of the shorter sides. Lift it up and press the tabs to stick to the bottom half of the short side. The score line should be just above the tabs. Fold the top half of the side down over top of the tabs and press well. All of this folding and gluing will make the box look clean, as well as help it be stronger and to keep its shape!

If you feel like the box needs a little more stability, you can add a piece of tape to the corners on the inside of the box. This is also a good time to make sure that the box lid fits well over the bottom piece and make any adjustments if needed.

Now the box is ready to be filled with goodies! Like I said before, this is the perfect-sized box for gift cards, jewelry, candy, and more for teachers, school friends, and co-workers. You can even have some boxes already colored to keep on-hand that can be filled with a gift or two for those super last-minute gifts!
Don't forget to Pin, Like, and Share!


