Have fun paint pouring on coasters to create miniature works of art for your coffee table!

Have you tried paint pouring yet? I have been putting it off, and boy have I been missing out! There are so many amazing paint pouring projects out there, and I felt inspired to give it a try. After spending a few hours experimenting with Marbling paint, I created these set of coasters that are like tiny works of art for my coffee table! It might be messy, but paint pouring is an awesome craft to do with kids inside or outside the house.

To get a successful paint pour, you need the right paints! You can use any kind of acrylic paints, which is great because there are SO many colors available. However, acrylic paints on their own are a little too thick for "pouring". You will need to combine the paints with some kind of pouring medium to thin it out to get the gorgeous marbling effects and will prevent the paint from cracking when it dries.
There are also some acrylic paints that come with the pouring medium already mixed in, like FolkArt Marbling paints. With these, you can go straight to pouring - no mixing involved!
For best results, I recommend working with 3-4 colors at the most, and also incorporating some black and/or white!
There are also some acrylic paints that come with the pouring medium already mixed in, like FolkArt Marbling paints. With these, you can go straight to pouring - no mixing involved!
For best results, I recommend working with 3-4 colors at the most, and also incorporating some black and/or white!

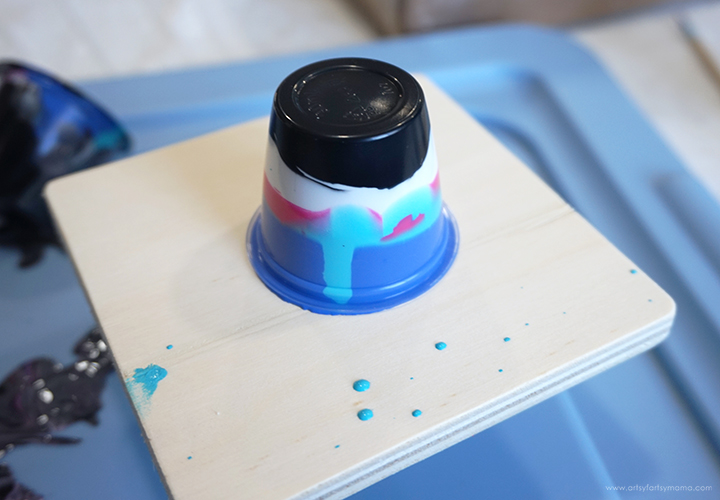
There are a few different techniques for paint pouring, so have fun experimenting for different looks! Pour a little bit of each paint color into the cup, right into the center of the color before. Have fun with it, and add the colors in any order you want!

The first method is "Flip Cup Pour". Place the coaster on top of the cup, and flip both the coaster and the cup over together so that the cup is now upside-down on top. Slowly lift the cup up and let the paint pour out!
Tip the coaster in all directions to cover the empty parts of the coaster and to get the "marbling" effect. Set the coaster on top of a cup and let the excess paint run off of the edges.
Tip the coaster in all directions to cover the empty parts of the coaster and to get the "marbling" effect. Set the coaster on top of a cup and let the excess paint run off of the edges.

Another method is the "Dirty Pour". Layer your paints in the cup the same way as before. Instead of flipping, just pour the paint right onto the coaster. The colors come out marbled and you can have a little control over where the paint is going. Once the cup is empty, tip the coaster in all directions until it is completely covered.
The one other technique I tried is adding drops of paint right onto the coasters. Tip the coaster in all directions to move the paint around. Add more paint as needed to get the look you want!
The one other technique I tried is adding drops of paint right onto the coasters. Tip the coaster in all directions to move the paint around. Add more paint as needed to get the look you want!

When you are done with your coasters, prop them up on a level cup in an area where they won't be disturbed. Depending on how thick you poured your paint, it can take least 24 hours for the paint to dry completely. Keep in mind that the air flow in the room and humidity can also affect the drying time.
After the coasters are completely dry, I recommend giving them a coat of Mod Podge Ultra. Instead of being painted on, Mod Podge Ultra can be sprayed! It comes in a matte or glossy finish, self-levels, and doesn't leave a stickiness behind once it dries. Spray a thin coat on all of the coasters and leave them to dry for about 30 minutes.

The bottoms of the coasters will have paint drips and paint residue left behind. Sand the bottoms of the coasters well to remove the paint. If you want a more finished look, trim and attach some felt or cork to the bottom of the coasters.
What do you think of these coasters? One of my favorite things is that even though I used the same paint colors for each coaster, they all turned out so different but still look great together as a set! I can't wait to try more paint pouring projects. #AFMCrafts
What do you think of these coasters? One of my favorite things is that even though I used the same paint colors for each coaster, they all turned out so different but still look great together as a set! I can't wait to try more paint pouring projects. #AFMCrafts
Looking for more camp craft inspiration?
Check out this collection of OVER 100 creative camp craft ideas!!

Don't forget to Pin, Like, and Share!


I just did a deer todoay. Waiting for it to dry to do the second one. I used shades or purple and white for my 2022 purple them.
ReplyDelete