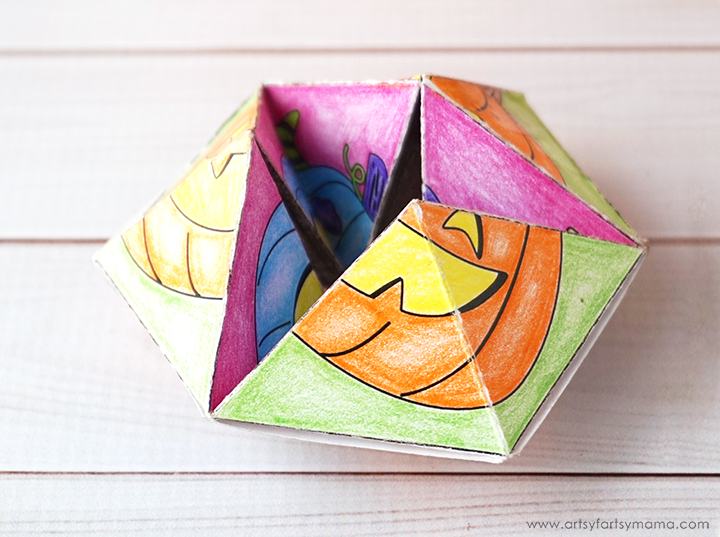
This Halloween Flextangle is a fun Halloween activity with a colorful “twist”!

Before there were fidget spinners, there were flextangles. Also called kaleidocycles, flextangles are a fun, hexagonal origami project for kids of all ages to color, assemble, and turn. And turn. And turn! I made a flextangle to color at MyPrintly that is a ton of fun to make. This time, I wanted to make one specifically for Halloween! This will be a fun Halloween activity for the classroom, parties, or just for fun at home.
This post contains affiliate links to products I love and recommend.

Supplies:
Halloween Flextangle printable
Halloween Flextangle printable
Download and print the Halloween Flextangle printable on cardstock. Copy paper is easier to fold, but cardstock holds up better to the rotating (trust me on this one). Use colored pencils, crayons, or markers to color the flextangle.

Cut the flextangle out by following the outer border only.

Folding clean, straight lines is key for a successful flextangle. To do this, use a scoring tool and a ruler to score all of the vertical and diagonal lines. Use the black printed lines as a guide for the diagonal score lines. Line a ruler up with the top points with the dashed guidelines in the "glue" sections to score the vertical lines.

Fold all of the vertical and diagonal lines. Bending the paper in both directions a few times will help to make it more flexible when you're assembling and rotating the flextangle.

Add a thin layer of glue to the glue guide at the bottom of the flextangle template (labeled "glue"). For best results, use a quick-drying glue. You can also use double-sided tape.

Bring the colored/top end of the paper around like a tube. Line up the colored piece with the section covered in glue. Press the sections together and hold in place until the glue has set. Line up the other two sections and glue them to the corresponding glue guide. Hold each one in place until the glue has set.

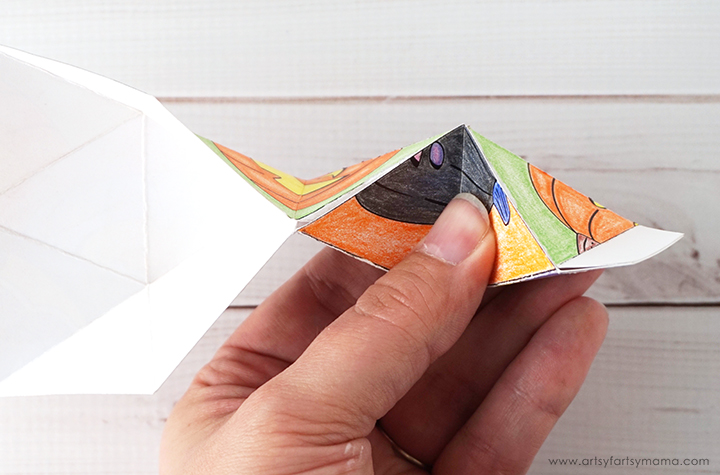
Once the glue has dried, bend the 4 sections toward each other. This makes the flextangle more, well, flexible and it helps to make sure none of the seams come undone. If the pieces do come apart, re-glue the area or add a piece of clear tape over the seams.

Add a thin layer of glue to both of the end tabs. Bring the two ends of the flextangle together, and place the end tabs inside of the open end. Hold the seam in place until the glue has set.

When the glue has set, try rotating the flextangle. Sometimes the end tabs can pop out due to the pressure. To add a little extra support, you can add a piece of clear tape over the seams.

When you first begin to turn the flextangle, go slowly. The paper needs to rotate through a few times before it loosens up and becomes more flexible. If you go too fast, the glued seams could come apart, or you could potentially rip the flextangle.

This is a fun project for kids of all ages, and would be a fun Halloween activity in the classroom! Smaller children will need help assembling the flextangle, but once it’s ready to play with, they will be entertained for hours.
Pin this project to make later:


I want to thank you for this flex tangle. Halloween is my favorite holiday, the kids have been asking to make another flex tangle, even though they complained bitterly how hard they are! This is so perfect, working with a friend to make Halloween bags and watch Hocus Pocus today this will make such a nice break in between. THANK YOU THANK YOU !!!
ReplyDeletethis is cool i love it
ReplyDeleteMy 7 yo and 12 yo loved making these for Halloween. Thank you!
ReplyDeleteI like it i enjoyed making it for hollowen
ReplyDeleteTHANK YOU! іt is perfect!!!
ReplyDeleteI am struggling with where to glue the glued tabs to - Would love help - want to do this project with my before/afterschool kiddos
ReplyDelete