This post is sponsored by LEGO and contains affiliate links. As always all opinions are my own.
Make your own custom clock out of LEGO bricks!

It might be a little obvious by now, but we adore LEGO in every style, shape and color at our house. March is National Craft Month, so we decided to celebrate by making something together as a family. My husband has been teaching time to 3rd graders at school, and that inspired me to make a custom clock out of LEGOs. It was so much fun to build, and I hope you feel inspired to get building, too!

You need to start with a LEGO baseplate. We used a green 10"x10" Classic LEGO Baseplate. These can be found on the LEGO website and at most retailers.
You'll also need to get a basic clock mechanism. These are easy to find at most retailers and come in a variety of styles. My recommendation is to find one that isn't too fancy, has long enough arms to fit the clock, and to not spend too much money.


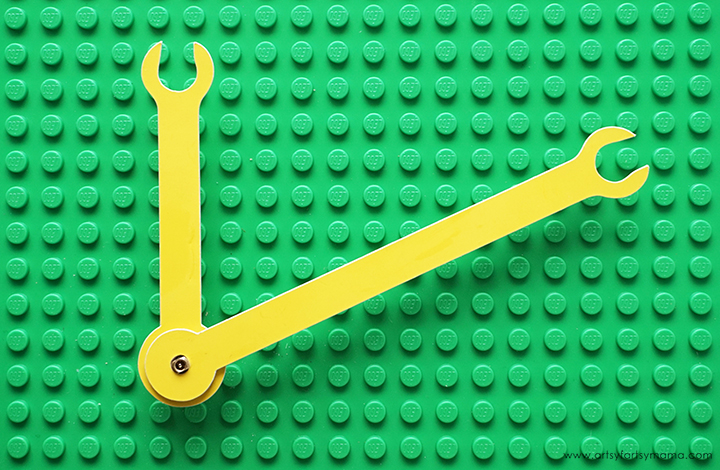
To make our clock hands coordinate with the LEGO theme, I created some custom LEGO hands to replace the ones included in the clock mechanism. I uploaded the image (see how) into Design Space and cut the LEGO hands out of yellow poster board with my Cricut Maker machine.
Because I'm so happy that you're here, I'm sharing my LEGO Clock Hands SVG file (for personal use only) for you to use to make your own clock!
The original clock hands were a little too large/wide, so we used some scissors for cutting metal to trim them down. Be very careful not to bend the hands while you cut!

Add a bit of super glue to the tops of the clock hands and stick them to the back of the LEGO clock hands. Lay the hands flat to dry according to glue package directions.

Place the hands back on the clock mechanism to make sure they are laying flat and look good. You can also put the batteries into the mechanism to test it out if you'd like. Carefully remove the hands and set them aside.

Now, for the toughest part: decide on your clock design. The baseplate is your blank canvas. Dump out the LEGO bricks and come up with something amazing. The possibilities are endless, so get creative!
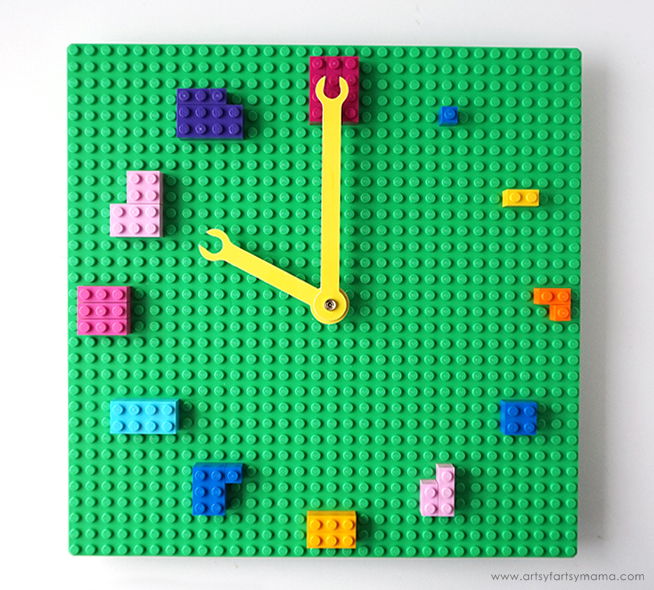
After talking through a few different ideas, we finally decided on this clever design. We used LEGO bricks in different colors, but the same amount of "studs" for each of the clock numbers! For example, a 1x1 brick for 1:00, a 2x2 brick for 4:00, a 2x4 brick for 8:00, and so on! We used other 1x1 and 1x2 bricks paired with the other bricks to get the other numbers.

Once the clock building is done, put the clock hands back on and add any additional clock hardware. Place batteries in the clock mechanism and set the time. Now you have your own custom LEGO clock that you can hang anywhere and change the design of anytime! My family is loving this new clock so much that we decided to hang it up in our living room where we can see it every day.
Where would you hang up a LEGO clock?


This is a really fun clock! I wish I had thought about doing something like this when my oldest son was little. He was crazy about Lego.
ReplyDeleteOh my goodness that is so clever! My daughter LOVES Legos, I bet she'd love this.
ReplyDeleteThis is a really awesome idea! I can't wait to try it out with my family. I know my nephews will absolutely love it!
ReplyDeleteThis is great!! I totally have to do this with my kids!
ReplyDelete