Transform into the cutest pet in town with these easy-to-make DIY Dog Costume Accessories!

My daughter has been taking an acting class, and they put together a play to perform for the parents to show what they've been learning. As most kids do, she let me know a few days before the big night that she needed a dog costume to wear in the play! After a moment of panic, we put our heads together to come up with a simple costume that she could wear. Whether you're just playing dress-up or need to complete a costume, these DIY Dog Costume Accessories are easy and fun to make!
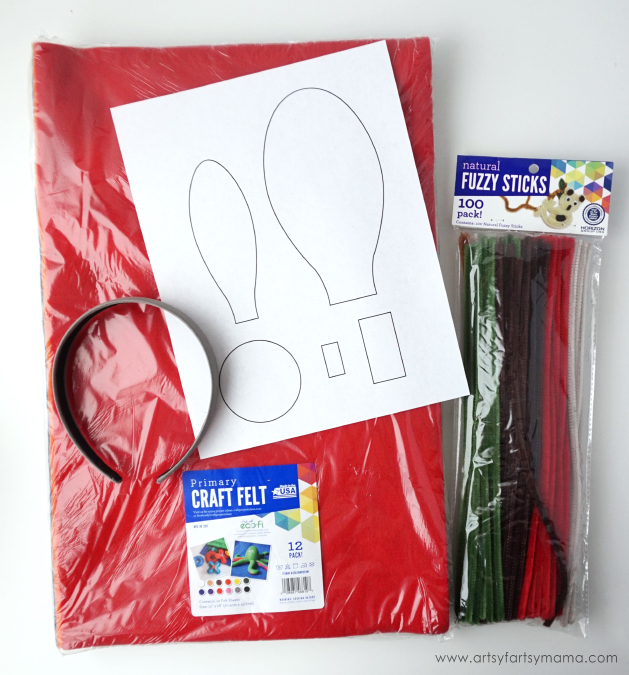
I have created a pattern for you to easily make the dog ears (with optional bow) and dog collar. Kids will love helping create their own accessories to complete a costume or just to wear when playing dress-up. All of the supplies are inexpensive and easy to find - you might already have them on-hand!
Supplies:
Craft Felt - Brown, Tan, Black, Gray, Pink
Fuzzy Sticks - Brown
Headband
Scissors
Glue Gun, Glue Sticks
Pen or Marker
Velcro - I used 3/4" adhesive-backed circles

Print and cut out the Dog Accessory Pattern pieces. Fold some brown felt over and use a pen or marker to trace the "outer ear" template with the straight edge on the fold. If you are using a wider headband, move the pattern up about an inch before tracing. Trace a second outer ear piece, and move it up the same amount if necessary.

Use sharp craft scissors or fabric scissors and cut out the ear pieces along the marked lines. Do not cut through the fold.
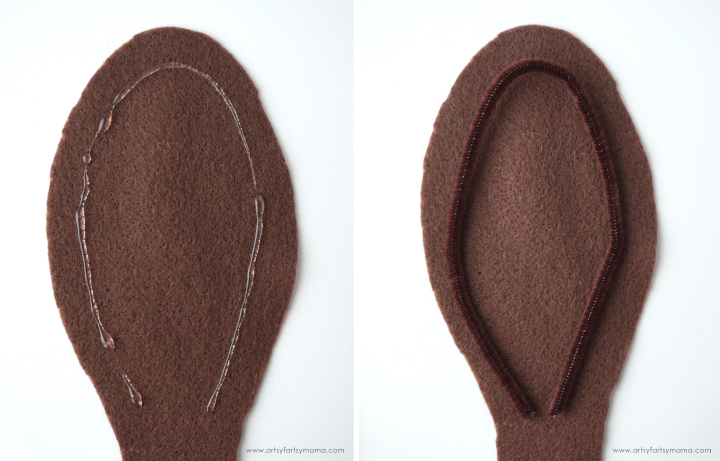
Open up the ears. On one side of the ear, add a line of hot glue 1/2" from the edge. Bend a fuzzy stick into a similar shape, and carefully press it down into the glue. Repeat for the second ear.
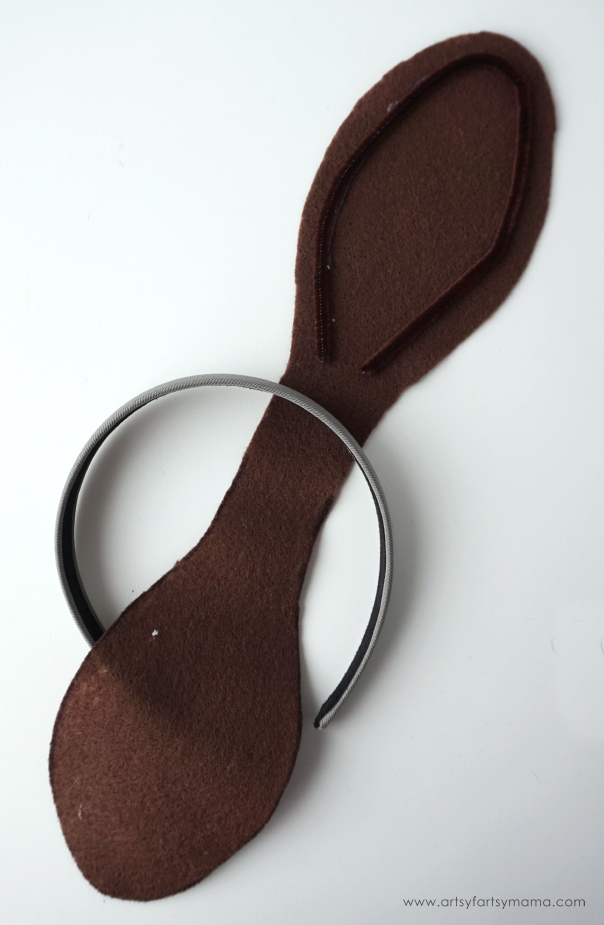
Lay the ear piece flat with the headband over the center of the template. Adjust where you want the ear to be placed. Add some glue around the edge of the ear next to the fuzzy stick, as well as in the center. Make sure to add a little glue right above the headband.

Carefully fold the other end of the ear over and line up the edges with the headband in the middle. Press the felt together so that it bonds well. Repeat for the other ear.

Cut out the inner ear template and trace the shape on tan felt (a light pink would also be cute). Cut out the felt and glue in place on the center of the ears, lining up the straight edge with the top of the headband.

After putting the ears together, they were a little more floppy than we wanted them to be. I wouldn't call it a fail, but a learning experience! To give the ears a little more lift, I folded another fuzzy stick into fourths and glued it to the back of the ears. Luckily no one else will know (except all of you), because they are on the back. Plus my daughter's hair will be pulled up and covering them up. Nothing to worry about!

Now you can bend the ends of the ears over and shape them to look how you want them to. Thanks to fuzzy sticks, the ears will keep their shape and make the ears easy to manipulate! At this point, the ears are done. Unless you want to add a....
DIY Felt Bow

My daughter wanted everyone to know that she was a "girl" dog, so we needed to add a bow. Felt bows are so easy and FUN to make. You can also use these bows for regular headbands, hair clips, faux bowties, and more! Choose the color of felt you want to use for your bow and cut out the pieces using my Free Printable Bow Template.
*Tip: don't use black marker on light-colored felt... it's just not the best idea.
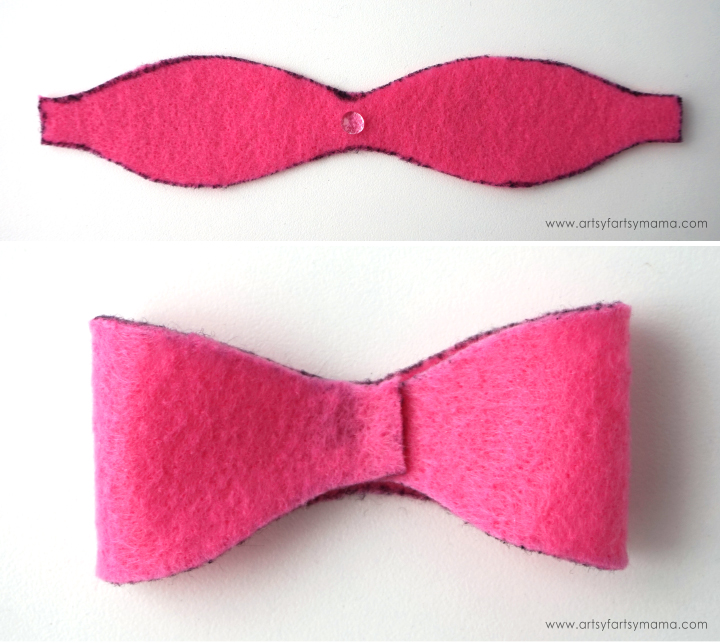
First, assemble the main bow piece. Lay the "bow center" piece flat (with the marker lines up). Add a drop of glue in the center. Bring both ends of the bow to the center and press them into the glue.
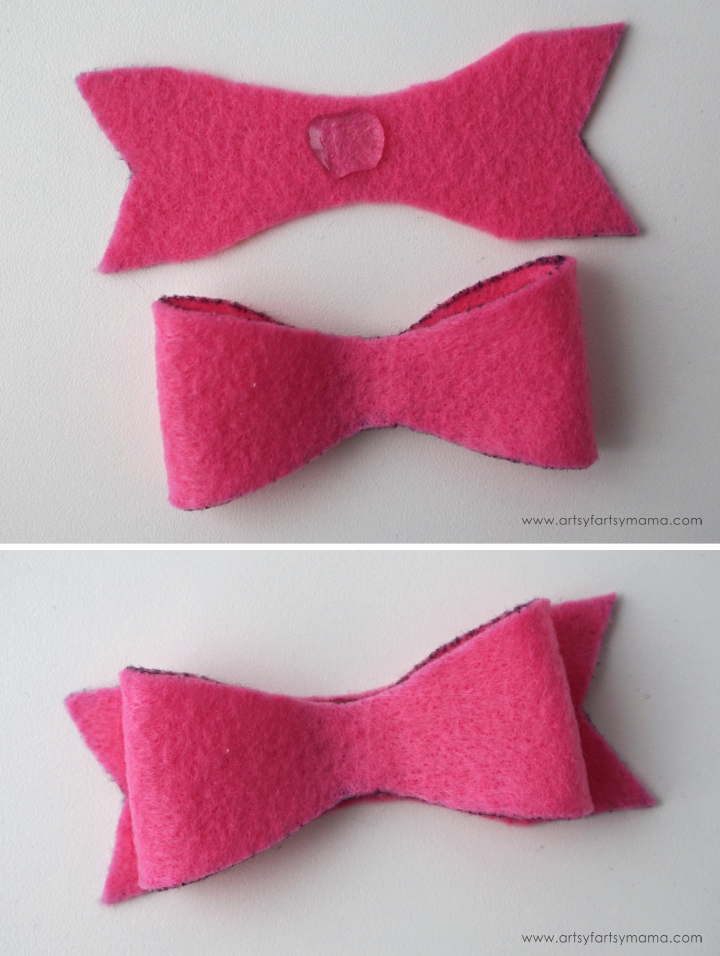

Place a drop of glue on the center of the bow. Center the loop piece vertically on the bow and press in place. Wrap the loop around and glue the ends on the back of the bow tail.


To attach the bow to the ears, add a little bit of glue along the bottom of the bow. Place the bow wherever you want on the headband and hold in place until the glue has set.
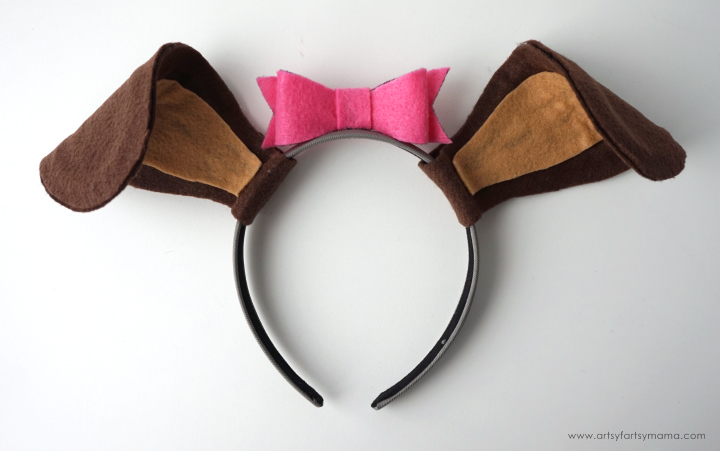
Voila! Now we have perfectly sweet and girly puppy dog ears!
DIY Felt Dog Collar

To make the collar, measure around your child's neck and add an inch. Cut a strip of felt about 1.5-2" (I cut mine about 3") high and as wide as your neck measurement. Also cut out the collar pieces included in the dog ear template. I used black for the collar piece, and gray for the tag.

Add glue to the top half of the black collar piece. Center the collar piece on your collar. Line up the top edges and press in place. The bottom half should not be connected.

To be able to wear the collar, I added a 3/4" set of adhesive-backed Velcro circles to both ends. These ones were no-sew and made for fabric, so they hold up great with little work!

Another option would be to cut the collar 1.5" x (neck measurement +1"), and cut two collar centers instead of one. Glue one collar center to the front and the other on the back. Sandwich the tag in between them both. Same look, different strategy.

Instead of adding a name to the tag, we cut a heart out of our extra pink felt and glued it to the center. Easy as that and it turned out darling! Let the kids get creative to customize their own dog tags. They'll love it!

Place the headband on your child's head and adjust the ears as necessary. Wrap the collar around the neck and close with the Velcro. Make sure that it's not too tight! Adjust the fit as necessary. My daughter wore a coordinating pink shirt along with the accessories, and the play was a total success! These DIY Dog Costume Accessories will be great to use for pretend play, and for Halloween as a basic dog costume or to take an average dog costume up a notch!


This is too cute! Thanks for joining!
ReplyDeleteThis is such a fun costume idea!
ReplyDeleteSuch a simple and cute costume!!
ReplyDeletevery cute, when I read your title I really thought it was going to be a costume for a dog
ReplyDeleteWe were looking for a dog ear pattern to make a headband for a birthday gift! The pipe cleaners are genius. Thank you!!!
ReplyDeleteIs it ok to use a thinner headband?
ReplyDeleteSaved as a favorite, I love your website!
ReplyDeleteThese are awesome, thank you!
ReplyDeleteThank you so much for this!! I had to make my daughter a Peter Puppy costume for her Letterland parade at school... I needed a pattern for ears. I ended up using yours for ears and a collar. It turned out sooo freakin cute! I wish I could share a photo with you. I'm definitely saving your website for future arts & crafts. Thanks again!!
ReplyDelete