Fruity Summer Bag Toppers are an easy Make It Now project in Cricut Design Space!

With summer on its way, I wanted to make a little treat for my husband to share with his coworkers and fellow teachers to wish them a "sweet" summer break! I was searching for inspiration in Cricut Design Space, and came across these adorable Summer Bag Toppers as a "Make It Now" project. In just a few minutes, I was able to create something special to share with friends. I'm excited to share how you can do it, too!
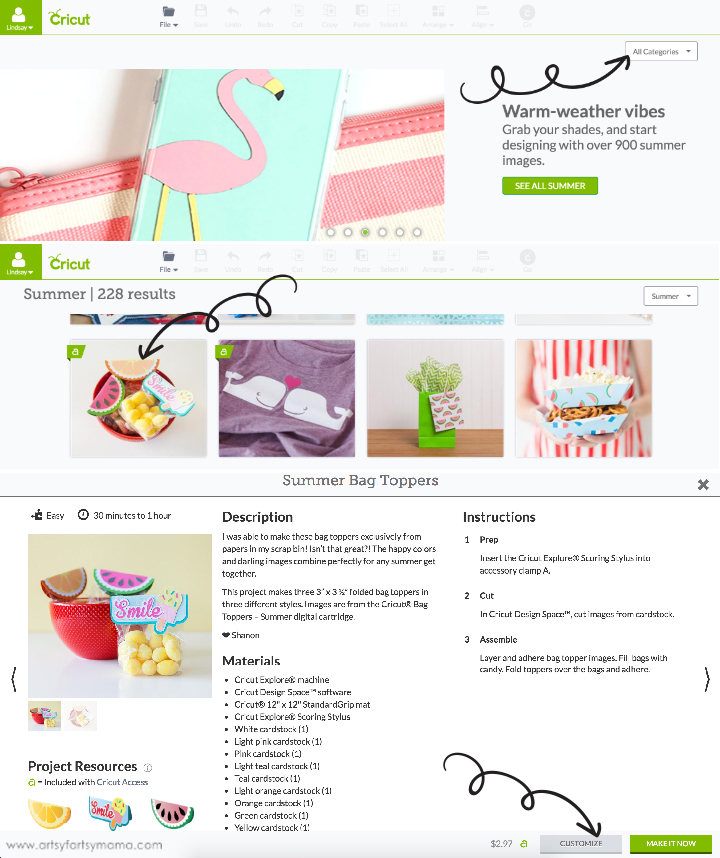
1. Log in to Cricut Design Space. In the drop down categories box (top right corner), select "Summer" to bring up all of the summer-themed Make It Now projects.
2. Open up the Summer Bag Toppers canvas that I've saved for you, or you can scroll through the Cricut Image Library to find the project.
3. Once you've found the image, you'll see that there is a list of materials and instructions. If you'd like to make the project as shown, click "Make It Now" and it will take you directly to cutting. My bag toppers are slightly different, so by clicking "customize", you can make a few adjustments to the project.
At the bottom of the screen, you'll see that this project costs $2.97. However, if you subscribe to a Cricut Access monthly OR yearly membership plan (that you can cancel anytime), you get instant access to the 1,000 Make It Now projects, including these Summer Bag Toppers!! With a subscription, you also get additional benefits of unlimited use of images and fonts, as well as discounts on purchases made on the Cricut website. Once you've subscribed, you can get to work creating all the available Make It Now projects in Design Space with the green "a" Cricut Access symbol!
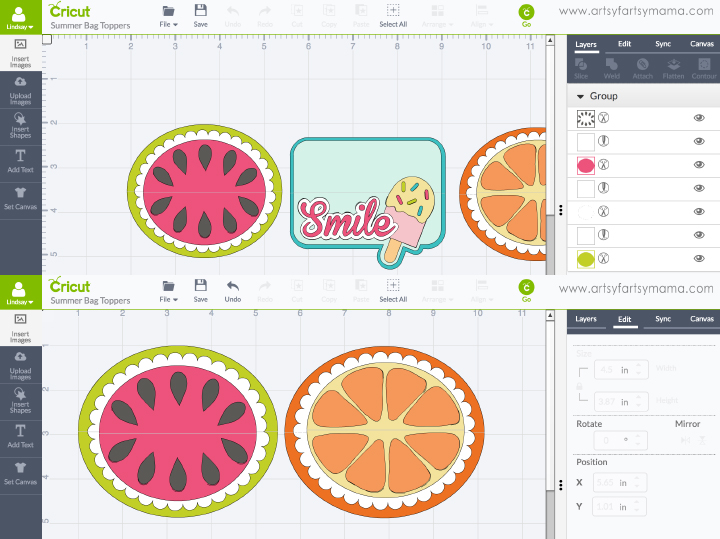
After you select "Customize", you will be taken to the Design Space canvas to make adjustments to the project. The original Summer Bag Toppers project makes three different 3" x 3.5" bag toppers. I only wanted to make the watermelon and "lemon" toppers, so the first step is to delete the "Smile" bag topper. All you need to do is select that design, and click "delete". Easy enough, right?
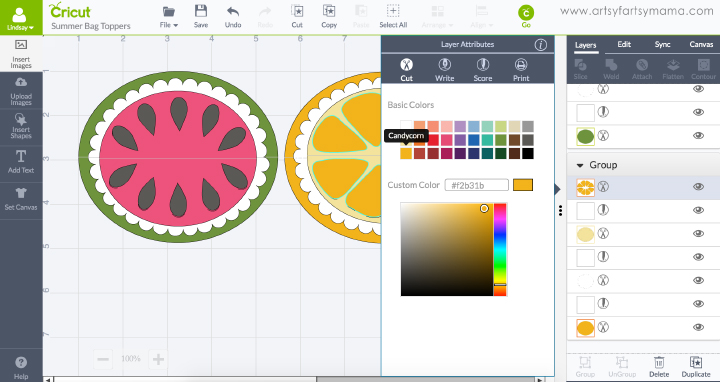
Now to make that orange look more like a lemon! Click on the thumbnails of the design in the "Layers" panel to bring up the color palette. I changed the color of the outer circle and the segments of the lemon to "Candycorn". The main reason for doing this is because Design Space likes to help you make things easy when it's time to cut. If your design is in different colors on the canvas, your project will be organized into different mats. I wanted to make sure I was cutting all of the yellow objects on the same mat, so I selected the same color for each part of the design.

My treat bags are 4" wide, so I resized the bag toppers to 4.25" wide so that they would fit well. Each of the bag toppers are "attached", or grouped together. So all you need to do is select each bag topper and change the size in the "Edit" panel.
Now we're ready to cut! Click the green "Go" image at the top of the screen with the Cricut logo.

The next screen shows all the mats you'll need, separated into the different colors. You can make slight adjustments at this point, such as mirroring (for iron-on), changing mat sizes, etc.

The next step is to adjust the Smart Set dial to point at cardstock (whatever material you will be cutting). You'll see in the program what the dial is currently set to, so there's no worry. Don't see your material in the circle? Set the dial to "custom" and you can choose your material from a dropdown list under the "Set" step.
The dial saves the headache of having to manually adjust the blade depth or speed settings, and you to get the perfect cut the first time!
The arrow button below the dial will begin flashing to prompt you to load the mat. The program also reminds you to complete this step and won't allow you to cut without doing it. Once your mat is properly loaded, the button with the Cricut logo will begin flashing, which means "GO" and that you're ready to cut your project out.

The next step is to get the materials ready. For the Lemon Bag Topper, you'll need a 12x12 adhesive cutting mat, a Scoring Stylus, some yellow cardstock and some white glitter cardstock.

The scoring stylus marks horizontal lines across the white and yellow pieces of the lemon. Fold the circles along that fold line. Use some clear adhesive (I love Aleene's) to glue white glitter cardstock on top of the yellow cardstock.
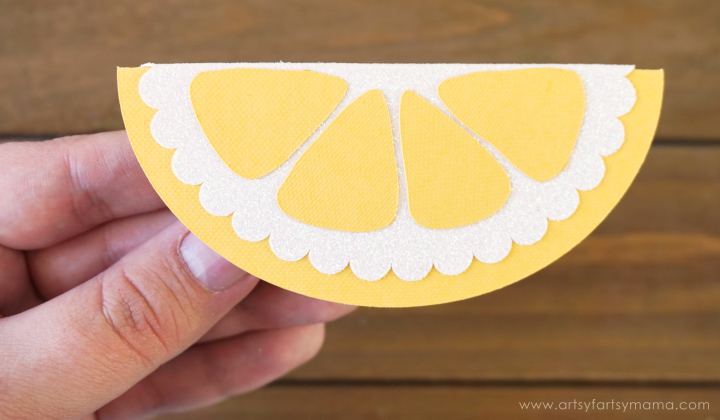
Next, arrange 4 triangle segments on both sides of the bag topper and glue them down. Let the glue dry completely.
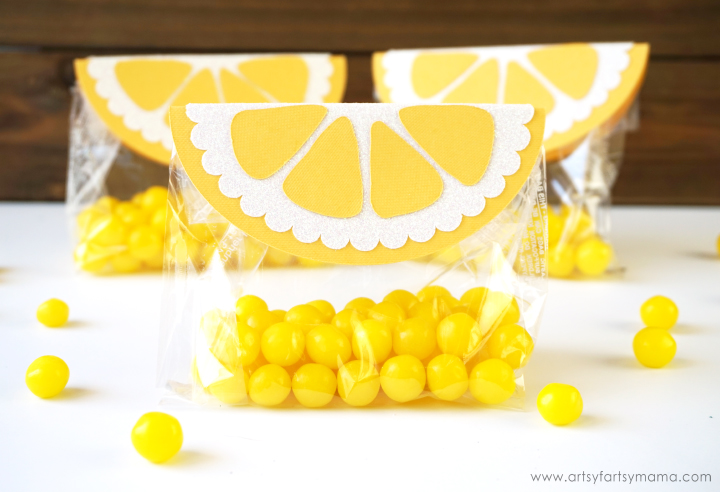
Pour some lemon candy into a clear treat bag, fold the top over and close with a piece of tape. Add a glue dot under each side of the lemon bag topper, fold it over the top of the treat bag. Press it down so that the glue dot sticks well.
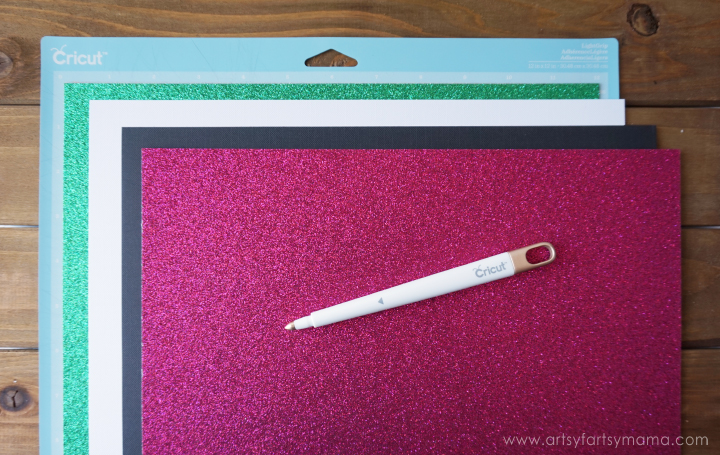
For the Watermelon Bag Topper, you'll need a 12x12 adhesive cutting mat, a Scoring Stylus, black & white cardstock, and I also chose Dark Rose & Dark Green from the Cricut Brights Glitter Cardstock Sampler.

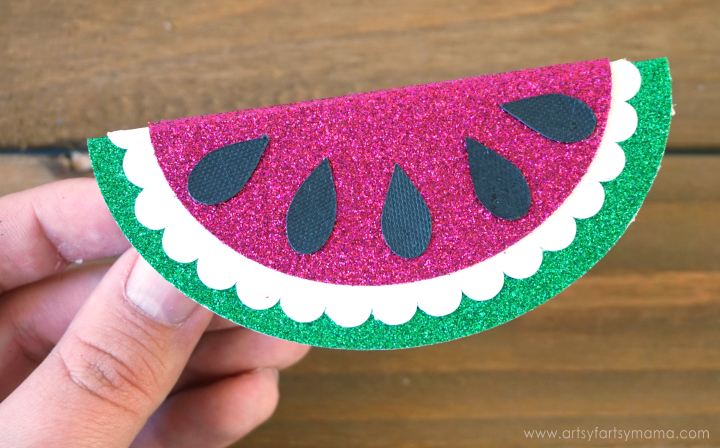
Glue the white cardstock over the green glitter cardstock. Let it dry, then stick the pink glitter on top of the white. Place 5 black seeds on each side of the bag topper and let it dry completely.


The next step is to get the materials ready. For the Lemon Bag Topper, you'll need a 12x12 adhesive cutting mat, a Scoring Stylus, some yellow cardstock and some white glitter cardstock.


Next, arrange 4 triangle segments on both sides of the bag topper and glue them down. Let the glue dry completely.

Pour some lemon candy into a clear treat bag, fold the top over and close with a piece of tape. Add a glue dot under each side of the lemon bag topper, fold it over the top of the treat bag. Press it down so that the glue dot sticks well.

For the Watermelon Bag Topper, you'll need a 12x12 adhesive cutting mat, a Scoring Stylus, black & white cardstock, and I also chose Dark Rose & Dark Green from the Cricut Brights Glitter Cardstock Sampler.

With paper crafts, I like to mix up glitter and regular cardstocks. Fold the pieces along the score lines, then assemble with adhesive.

Glue the white cardstock over the green glitter cardstock. Let it dry, then stick the pink glitter on top of the white. Place 5 black seeds on each side of the bag topper and let it dry completely.

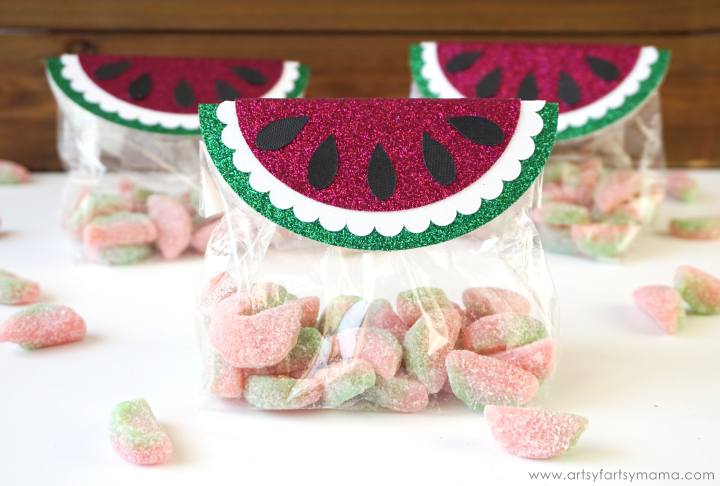
Fill up a treat bag with watermelon candy, then attach the watermelon bag topper to the treat bag with glue dots.

These Fruity Summer Bag Toppers are a lot of fun to make and are an easy paper craft that is perfect for summer! We are planning on sharing these with friends at school to wish them a "sweet" summer vacation!
Have you ever made a Cricut Make It Now project?


