Posts may contain affiliate links (see Disclosure). Thank you so much for supporting Artsy-Fartsy Mama!
Wednesday, November 26, 2014

Glitter Peppermint Ornaments

Wednesday, November 26, 2014

Glitter Peppermint Ornaments

Read more »
These Glitter Peppermint Ornaments will look so cute with your holiday decor, and are so simple to make! You can also easily make them in a variety of colors, so they really can coordinate with any holiday color scheme.


Monday, November 24, 2014

20 Leftover Turkey Recipes

Monday, November 24, 2014

20 Leftover Turkey Recipes

Read more »
20 Leftover Turkey Recipes at artsyfartsymama.com

Thanksgiving is really one of the best holidays of the year. How can you not like a day filled with family, friends, and of course, good food?! Before throwing leftovers at your guests to take home (hopefully not literally), keep in mind that you can make some really great recipes with that extra food! Check out these 20 delicious recipe ideas that use leftover turkey!!

20 Leftover Turkey Recipes at artsyfartsymama.com

2. Turkey Stroganoff from Simply Recipes
3. Leftover Turkey Enchiladas from Baked by Rachel
4. Slow Cooker Turkey Chili from Two Peas & Their Pod
5. Turkey Spaghetti Bake from What's Gaby Cooking
6. Thanksgiving Cupcakes from MOMables
7. BBQ Turkey Pizza from White on Rice Couple
8. Crock Pot Hot Turkey Sandwiches from Recipes that Crock!
9. Turkey Cranberry Appetizers from High Heels & Grills
10. Slow Cooker Turkey & Potato Chowder from Baked by Rachel
11. Creamed Turkey Over Biscuits from Frugal Foodie Mama
12. Turkey Empanadas from Cheap Recipe Blog
13. Leftover Turkey Frittata from Domestic Fits
14. Turkey Pot Pie from Pink When
15. Turkey Tetrazzini from Spicy Southern Kitchen
17. Double Cheese Turkey Lasagna from It Happens in a Blink
19. Italian Turkey Soup from Your Homebased Mom
20. Turkey Mac and Cheese Casserole from Organize & Decorate Everything

Friday, November 21, 2014

Elf on the Shelf Advent

Friday, November 21, 2014

Elf on the Shelf Advent

Read more »
This is sponsored post on behalf of Michaels. As always, all opinions and ideas are 100% my own.

Elf on the Shelf Advent with Free Printable Clues at artsyfartsymama.com #MichaelsChristmas

We love our Elf on the Shelf that comes to visit every year! In the past, I've arranged the elf to be doing funny (not naughty) things around the house and love watching my daughter's reaction when she wakes up to see what he's up to each day. This year, I'm planning on doing something a little different. Each morning, the elf will be in a different place, but will be holding a clue to find a small, simple gift each day, counting down to Christmas day!!

Elf on the Shelf Advent at artsyfartsymama.com #MichaelsChristmas

All the supplies are Recollections Holiday products. They are found at Michaels, in the paper crafting section (on the aisle end-caps). There are so many products to choose from, including kits and all kinds of embellishments. The paper milk cartons were the first thing that caught my eye. There are 24 in each package, so I immediately knew they would make perfect elf gift boxes. I also purchased bag and card kits, straws with tags, and clothespins to embellish the cartons.

Tip: Even though all the products are already at great prices, I highly recommend watching for sales and use coupons to save even more!

Elf on the Shelf Advent at artsyfartsymama.com

The paper milk cartons come unassembled, which makes them much easier to embellish! I started by taking snowflake stamps and red ink pads from the bag and card kits and laying out the cartons.

Elf on the Shelf Advent at artsyfartsymama.com

Stamp all over the paper using both stamps. I love how the red ink looks on top of the red paper! You can stamp and assemble the cartons as you go, but I found it much easier to stamp all the boxes first, then assemble next. It also gives the ink some time to dry so you'll be less likely to smear the stamps and get ink all over your hands.

Elf on the Shelf Advent at artsyfartsymama.com

There are instructions on the packaging to fold the boxes. They were surprisingly easy, and it helps that there are already sticky tabs on the box so you can peel and stick as you go! One half of the carton top stays open and the other has a sticky tab to keep it together. Since I haven't filled mine yet, I'm keeping them closed with the cute, coordinating holiday clothespins!

Elf on the Shelf Advent at artsyfartsymama.com

Next, I cut a one inch strip from a 12x12 sheet of adhesive-backed cardstock. Regular cardstock would also work great, but I must admit that using the adhesive-backed cardstock makes things a little easier. It sticks easily and you don't have to get the glue out!

As you can see, the carton measures just a little over 12 inches, so the paper ends don't meet exactly. I fixed the problem by sticking one end near the center of the "front", and carefully wrapping it around the carton and getting the other end as close as possible.

Elf on the Shelf Advent at artsyfartsymama.com

To cover the gap, I used one of the stickers from the package of straws! The labels have a strip of adhesive, so just peel off the backing and stick it on the carton! Super easy and it looks adorable.

Elf on the Shelf Advent at artsyfartsymama.com #MichaelsChristmas

Repeat until you have all 24 cartons put together. Now you can fill them with whatever you like! I think we're going to put in some treats, and maybe throw a piece of paper in a few cartons with some kind of Christmas activity so it gives my daughter something different to do to get excited about Christmas than just eat candy.

Elf on the Shelf Advent with Free Printable Clues at artsyfartsymama.com #MichaelsChristmas

For this to work, you'll need to print out the Elf on the Shelf Printable Advent Clues so that your elf (or whatever you choose to use) can hold the clue each morning. There are ten cards that specifically count down to Christmas day, but the other 14 cards can be mixed up to be used any day you want. They all say where to hide the gift, so that makes your job MUCH easier!!

Don't do Elf on the Shelf? You can still do this activity with your kids as a fun way to count down to the big day and add things in the boxes to celebrate however works for you!!


Some things you should know before downloading:
*Artsy-Fartsy Mama printables are for PERSONAL USE ONLY.
*You may NOT modify, re-sell, redistribute, or claim the design as your own.
*Please do not remove the credits/watermarks.
*If you post this on the internet, credit must be given to Artsy-Fartsy Mama & linked back to my site.

Wednesday, November 19, 2014

DIY Sequin Tree

Wednesday, November 19, 2014

DIY Sequin Tree

Read more »
Sponsored by FloraCraft Make It: Fun®


DIY Sequin Tree and Glitter Ribbon Tree Tutorials at artsyfartsymama.com

Creating Christmas decorations is probably one of my favorite things. It's always so colorful, fun, and of course, includes sparkle in one way or another. This month's Make It: Fun® Team theme is foam cones, so I decided to create a DIY Sequin Tree that is super simple for anyone to make!

DIY Sequin Tree Tutorial at artsyfartsymama.com

What you'll need to create your own DIY Sequin Tree:
Floracraft® Make It: Fun® Foam Cone (I used a 6 inch, but you can create trees in 3", 6", 9", 12", 15", 18", and even 24")
Sequins (any color)
Satin Pins 
Birch Candlesticks or Napkin Rings
Felt (in color to match sequins)
Hot Glue

DIY Sequin Tree Tutorial at artsyfartsymama.com

Before assembling the tree, get comfortable and get Netflix (or other preferred TV or movie watching contraption) ready. The tree is seriously quite easy to put together, but it is a little time consuming.

Pour out some sequins on your table or into a cup. Place a pin through the hole of a sequin and stick it into the tree. I decided to start around the top edge, but you can really start anywhere you'd like. In my personal opinion though, I think either the top or bottom edge would be easiest. Then, add the next pin & sequin right next to the sequin, barely overlapping the edge. Overlapping will help you be able to hide the foam underneath and you can skip painting it or trying to cover it another way.

DIY Sequin Tree Tutorial at artsyfartsymama.com

Now for some craft fail admission. The image in my mind using the white head pins looked much better than it really ended up looking. They were too big, and were covering up the best part - the sparkly sequins!! So, I replaced all the pins with satin pins instead and love it SO much more. Learn from my mistakes and go with the short satin pins to begin with (for a 6" tree, I used a little over 450 pins, so be sure to buy more than you think you'll need)!!!

PS: The long satin pins work, too, but keep in mind they WILL poke through the other side of the foam cone along the top half and are a little more difficult to work with once you get to the other side of the tree...

DIY Sequin Tree Tutorial at artsyfartsymama.com

Keep going with the pins & sequins until you get to the bottom (or top) of the tree. I put some sequins on at an angle at the bottom of the tree because there was a tiny bit of white foam peeking through and I like the way it kind of rounds the bottom out. Also add some sequins to the very top of the tree to finish it off.

DIY Sequin Tree Tutorial at artsyfartsymama.com

This step is optional, but since the foam on the bottom of the tree is bare, the foam still sheds and it will be a little more difficult to add the base to your tree. So, I cut out a circle of coordinating felt and hot glued it to the bottom of the tree. Now the foam is protected, and you can add the base (also optional) much easier!!

DIY Sequin Tree Tutorial at artsyfartsymama.com

For the base, I used a birch napkin ring and spray painted it silver. Candlesticks also look great as a base. Once painted and dried, add some hot glue around the top edge, then attach it to the bottom center of the tree.

DIY Sequin Tree Tutorial at artsyfartsymama.com

Once the glue is dry, your tree is officially done! You can now put it on display or start making a bunch more in other colors and sizes!!

DIY Sequin Tree and Glitter Ribbon Tree Tutorials at artsyfartsymama.com

I paired my sequin tree with my Glitter Ribbon Trees (which are also made with Floracraft® Make It: Fun® Foam Cones) and am loving this sparkly holiday forest!! Both versions of trees are simple enough for almost anyone to make, and the supplies are inexpensive and easy to customize to your preferred holiday decorating color scheme.

For more foam craft ideas, visit the Make It: Fun site and follow FloraCraft on Pinterest and Facebook.

Monday, November 17, 2014

Ho Ho Ho!

Monday, November 17, 2014

Ho Ho Ho!

Read more »
Sponsored by Wood Creations

Ho Ho Ho Word Set Tutorial at artsyfartsymama.com

Christmas crafting is in full swing at our house, and I'm SO excited to show you my latest creation! This Ho Ho Ho Set from Wood Creations was so much fun to put together and looks great with my holiday decorations. Read through the tutorial, and be sure to enter to win an unfinished Ho Ho Ho Set for yourself at the end of the post!!

Ho Ho Ho Word Set Tutorial at artsyfartsymama.com

The Ho Ho Ho Set comes unfinished and wrapped up so you don't lose any pieces. You can pick up sets in any Wood Creations store, or purchase them online if you aren't close to any current locations. You can immediately get to crafting, but I like to rub everything down with sandpaper and round out most of the edges to make sure everything is smooth before I get started.

Ho Ho Ho Word Set Tutorial at artsyfartsymama.com

First, I start with the painting. Decide what color you want everything to be, and then paint the pieces with acrylic paint. I personally use DecoArt Americana paints and love that I only need 1-2 coats for full coverage.

Since there are more parts for it, the Santa is a little more tricky than the rest. I laid out the parts before painting, then kind of marked where his face and beard needed to go. The back is entirely white, and I carried the beard and hat section to the sides.

Ho Ho Ho Word Set Tutorial at artsyfartsymama.com

Once the paint is dry, trace the letters on cute holiday papers. Cut them out, then paint a coat of Mod Podge on the front of the letter and place the paper on top. Rub it with your fingers or a scraper to get out any air bubbles. Let dry completely.

Ho Ho Ho Word Set Tutorial at artsyfartsymama.com

Or, my personal favorite: covering the letters with glitter!! Get a scrap piece of paper to work on, because it's going to get messy. Lay the letter down, and paint a thick coat of Mod Podge. Sprinkle glitter over the entire letter and let sit for a minute or two. Lightly tap the top of the letter while there's still piles of glitter on it to press the glitter down into the Mod Podge. Then, carefully stand the letter up and tap it on the table to get any excess glitter off. Carefully bend the paper or make a funnel and pour the glitter back into its container. Let sit for a while to dry.

Ho Ho Ho Word Set Tutorial at artsyfartsymama.com

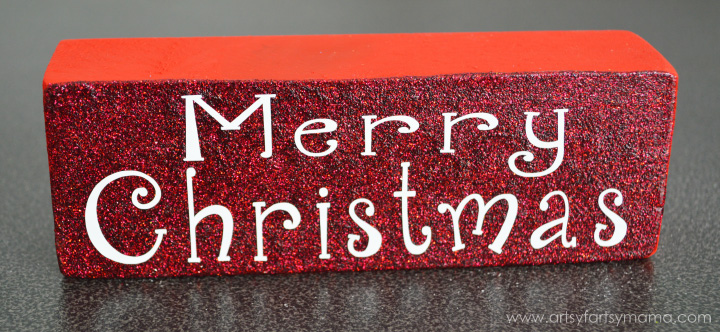
The set came with some "Merry Christmas" vinyl to attach to the block. Since vinyl doesn't normally stick to glitter that well, I tried something different. Glitter the block like you would the letters. Let dry, then cover the glitter with a thick coat of Mod Podge and let it dry completely. Once dry, you will have a smoother surface to stick the vinyl to - AND you get to keep it glittered!!

Ho Ho Ho Word Set Tutorial at artsyfartsymama.com

Santa has been painted, but needs to be assembled. Cut some holiday paper for his hat, and glitter his beard, mustache, and hat brim with white glitter and the holly with green glitter. Let everything dry completely before putting it together.

After the holly was dried, I glued on some sticker gems. Yes, they were stickers, but they won't attach well to a layer of glitter. Instead of Mod Podging the holly piece, I just put a dot of E6000 on the back of each gem and stuck them to the holly.

Ho Ho Ho Word Set Tutorial at artsyfartsymama.com

Once everything is dry, glue them in place with either hot glue or E6000 (I prefer E6000 because it's a little more permanent).

Painting his face might seem overwhelming, but I promise you can do it! Using a dry, small paint brush, dot it into a small amount of dark pink acrylic paint. Dab it on a paper towel or paint tray so that it's super light. Then, lightly dab it onto Santa's cheeks until they are the amount of rosy that you like. If his cheeks get too rosy, you can dab some flesh colored paint over the pink to lighten it up.

For his eyes, dab the end of a paint brush into black acrylic paint, and do a few practice dots on your paint tray or paper towel. Mark where you want the eyes with a pencil on Santa's face, then add the eyes with paint.

Ho Ho Ho Word Set Tutorial at artsyfartsymama.com

Set Santa somewhere safe to dry, lying flat. The glued on pieces might slide if you stand him up to dry. You can add any other embellishments you want (ribbons, more gems, etc), but I kept mine just like this.

Ho Ho Ho Word Set Tutorial at artsyfartsymama.com

Spray all the pieces with clear spray paint or polyurethane to protect the paper and to seal in the glitter (NO glitter mess at all when you need to move or pack up the set!!). Once dry, your entire set is finished!! You can stack the H's and O's on top of each other with the "Merry Christmas" underneath, but I liked the look of the "Merry Christmas" in the middle. That's what I love about these sets. You can make them all your own!! There are thousands of holiday paper designs and embellishments (which you can also purchase at Wood Creations) that will make every set look unique.

See more from Wood Creations on their blog, Facebook, Twitter, Instagram and Pinterest!

Monday, November 10, 2014

Glittered Thanksgiving Mason Jars

Monday, November 10, 2014

Glittered Thanksgiving Mason Jars

Read more »
Glittered Thanksgiving Mason Jars at artsyfartsymama.com

Looking to make a quick craft for your fall or Thanksgiving decor? These glittered Thanksgiving mason jars come together quicker than you think, and are super affordable! They'd be fun to make for a girl's night before the holiday, or they would look fabulous as your Thanksgiving table centerpieces.